Showing posts with label BURDA. Show all posts

Keeping It Simple

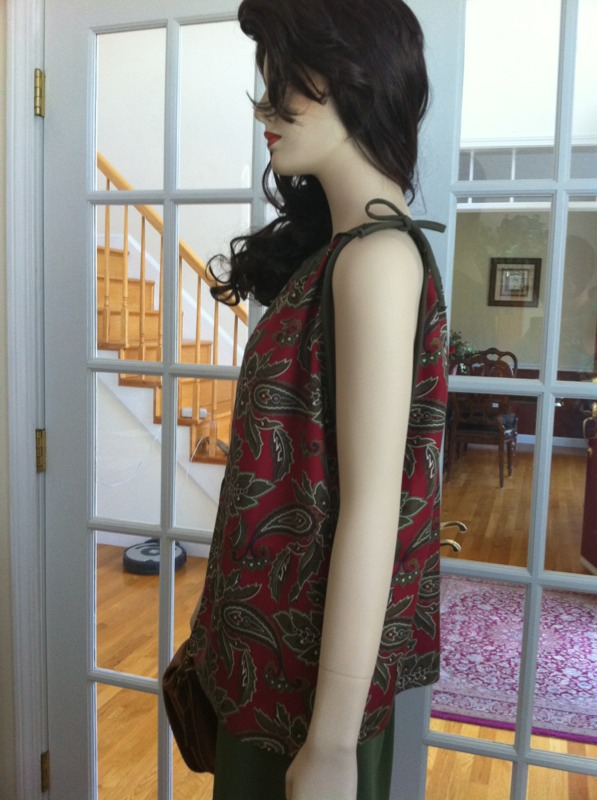
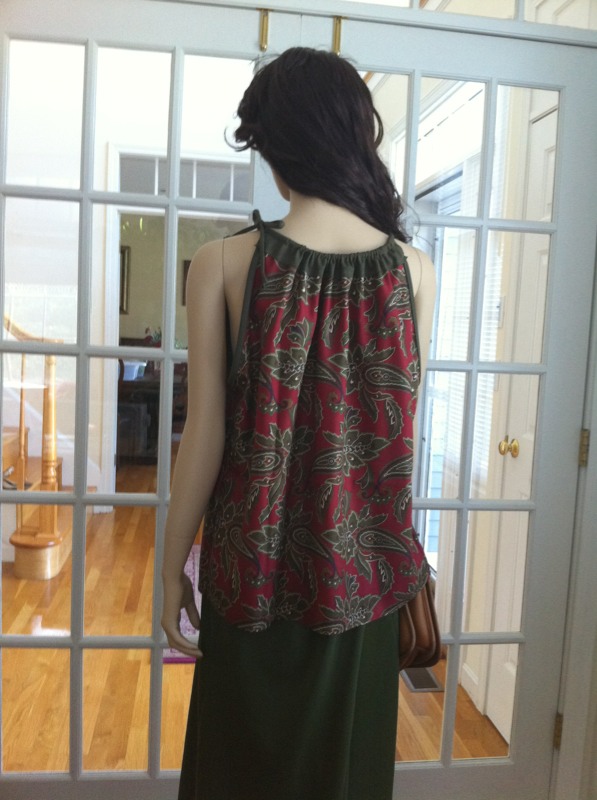
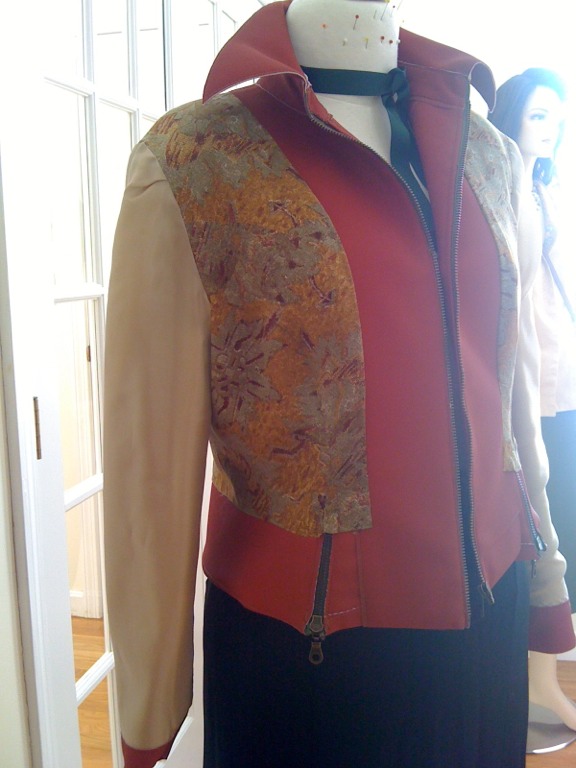
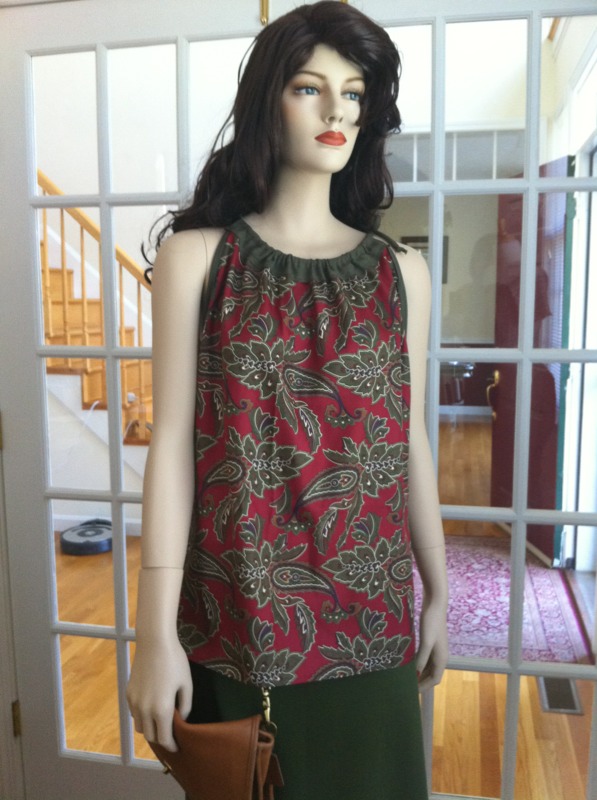
I love my BURDA Magazines. Some of the photography gives me a chuckle sometimes, but really, it is my favorite fashion magazine. This month, there was a quick beginner pattern. I stitched it up in some artisan silk that has been in my stash for years. A long time ago, I though I would make ties, but I never got around to it and I have since begun using my tie interfacing for sleeve heads. I had to deviate a little form the instructions since the artisan silk has no give whatsoever. Instead of folding the top under and stitching to form a casing, I cut bias strips of a really nice wool fabric that I used last year for a fabulous pair of pants. I used the wool as a facing on the right side. I also cut bias strips to make binding for the armscyes. Lastly, I made one long bias tube and thread it through both the front and the back and tied it at one shoulder. Oh yeah and did I mention that the hem edge is the selvedge? I am working on a skirt to match. I just have to add a contrast band in the green wool at the bottom and face the waist. The top looks really good if I belt it. If I don't, it looks too shapeless on me. Stiffany (That's my mannequin's name - get it? - she's stiff - hah hah!) looks great in it because she can wear anything well. I have a belt buckle kit which I have been dying to try. I think a slef belt with a fabric covered buckle would make the whole outfit look retro chic. In other news, I have been learning about pattern grading and sizing. Here is something I learned. I always thought that pattern sizes were such that if I gain weight, I go up a size. Well that is not the whole story because if a size 12 fits perfectly and I gain weight and move to a size 14, not only has the girth increased but the lengths have also increased so my bust to waist and my back length in the size 14 will have to be shortened ever so slightly. This is also true of RTW. My favorite Ann Taylor blouses were getting to tight and as I gained weight and moved up a couple of sizes, I eventually found that petite sizes fit me better - even though I am 5'6"! Food for thought...

The Suit Dress Is Finished

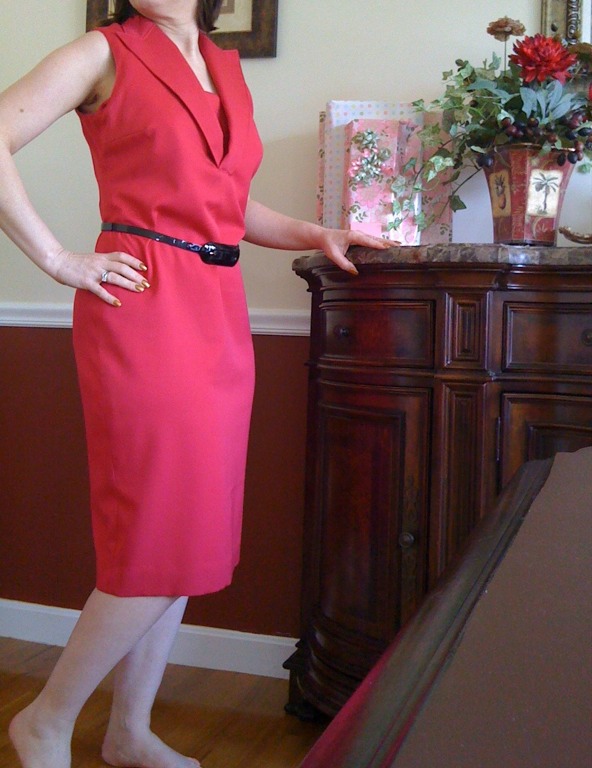
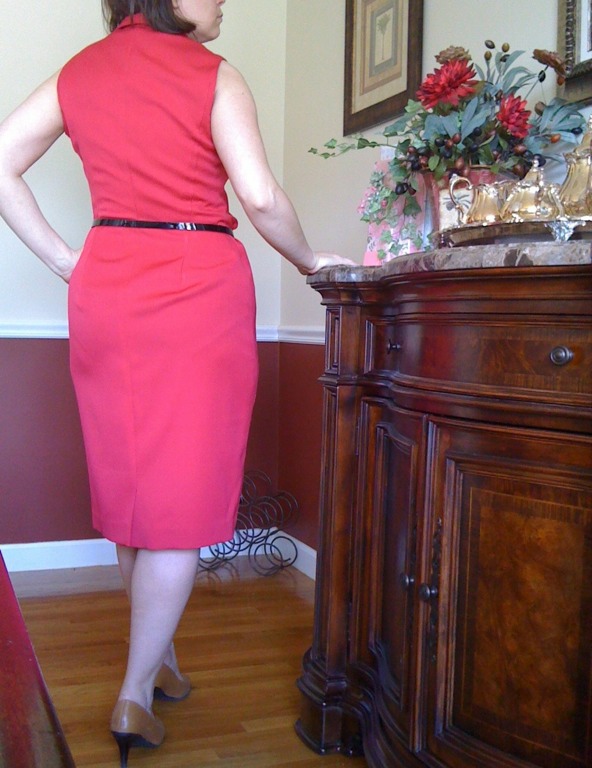
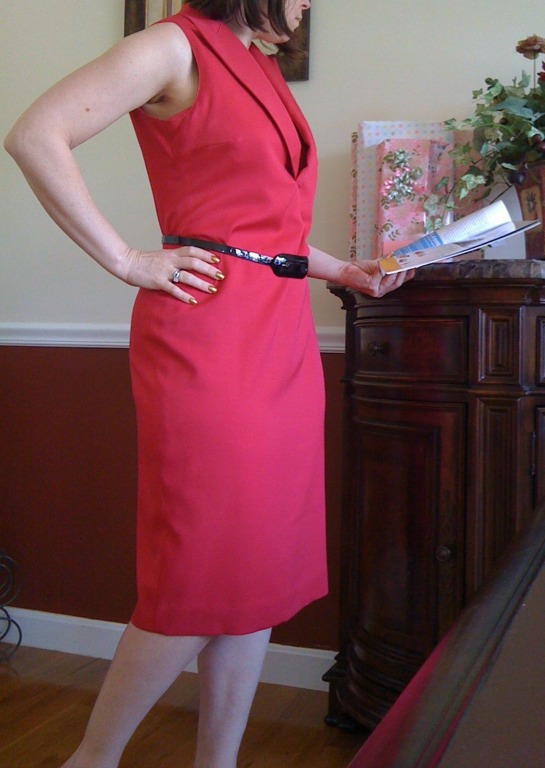
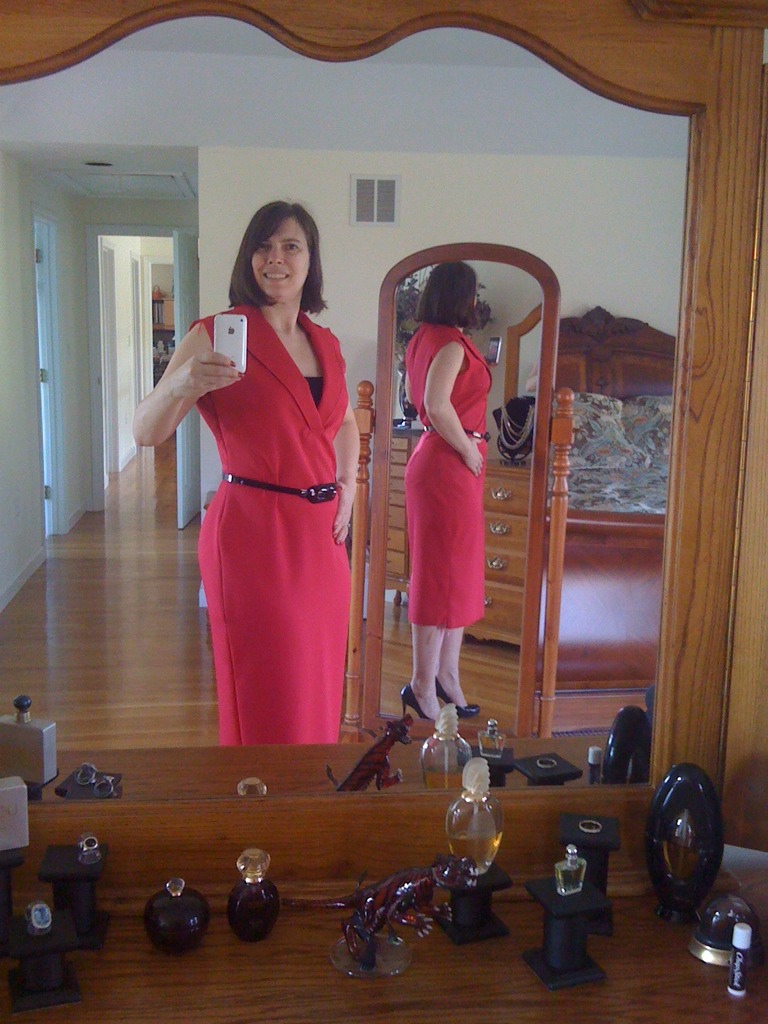
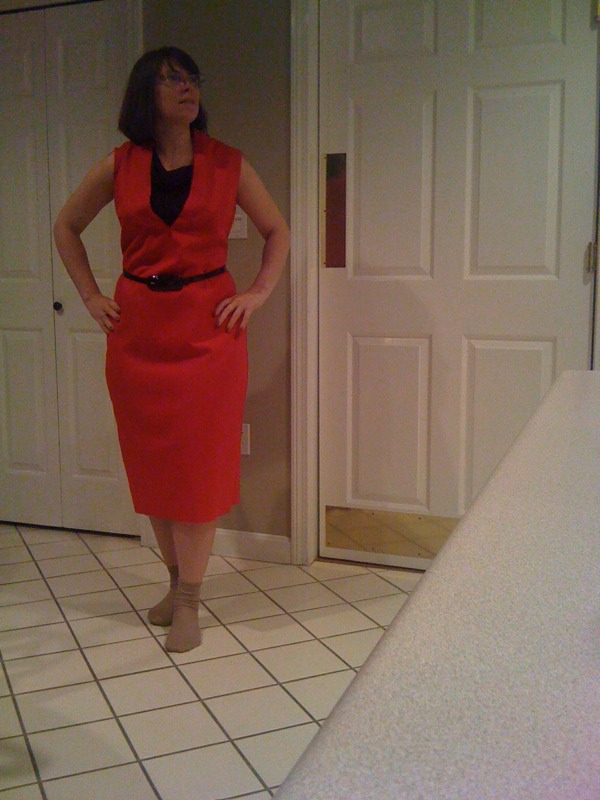
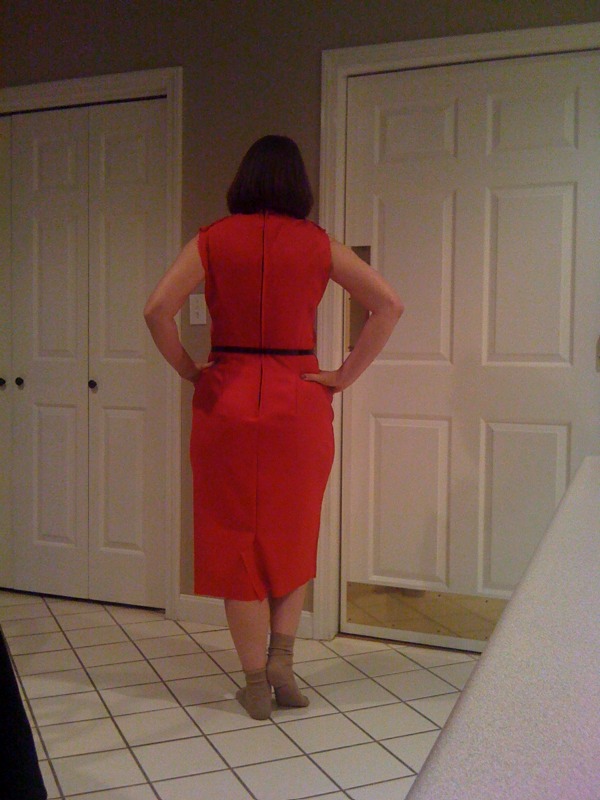
Finally, I have finished this dress. If you guys are like me, you are sick of looking at this dress. Really, I lost interest in it last month and it was a chore to finish. There were some unexpected challenges with this project and I am not as happy with the results as I had hoped. Still, I consider it wearable, and I may even sew the pattern again, but not in the near future. I am happy to cross this off my list and move on to the next challenge.

The Suit Dress Snag

click for a larger image in a new window

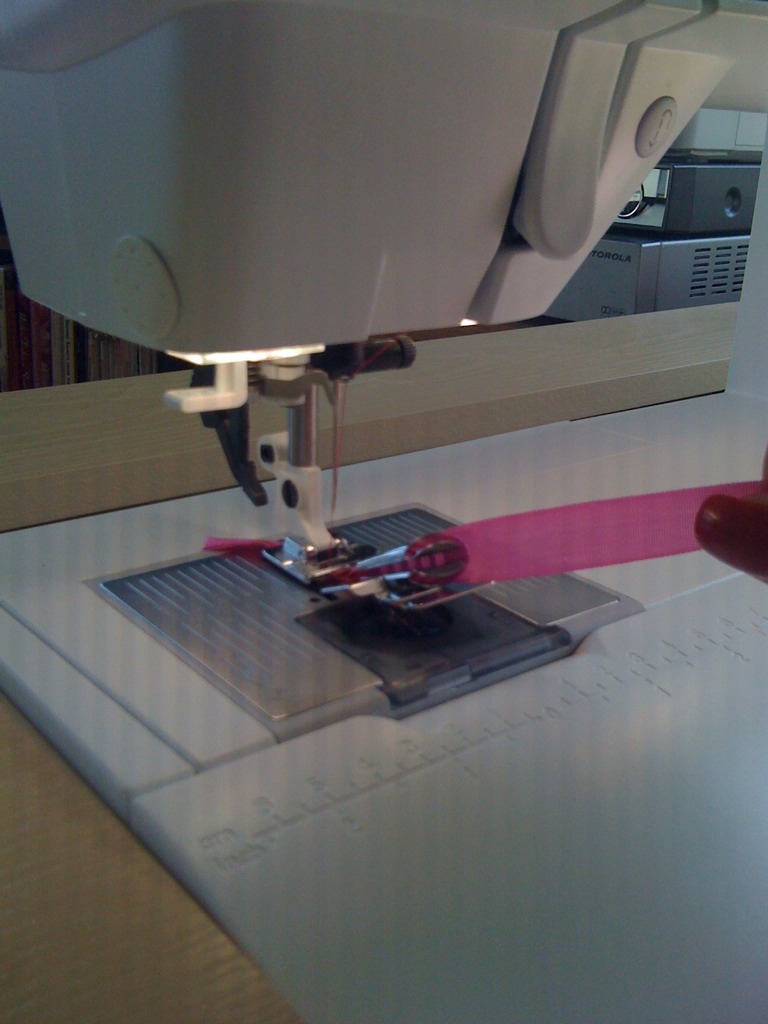
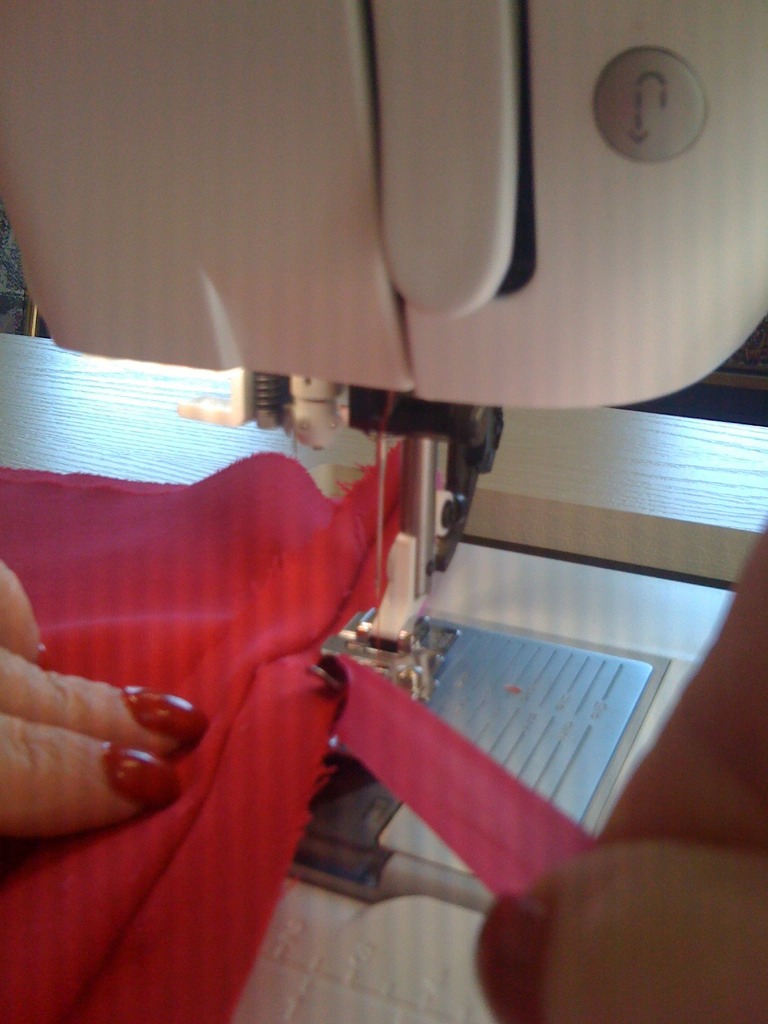
I finished all the seam allowances yesterday. I used the pink rayon seam binding shown above. It is called Hug Snug. I broke in my handy seam binder foot for the job. This little contraption folds the binding around the seam allowance edge and holds all three layers in place to be stitched with a straight stitch. I bought the foot for my Husqvarna Viking D1 but I never used it. Now I have a Pfaff Creative Vision. I had invested a small fortune in machine feet for the D1 and I was really bummed that they do not fit on the Pfaff. Not willing to part with my accessory feet without a fight, I bought a replacement ankle for the D1 and tried it on my Pfaff. It fit. Schweet! Then I tried snapping on a foot and taking a few stitches. I checked that the needle alignment was compatible and that the feed dogs were also aligned. Everything looked great, so I broke out the bias binder foot and gave it a try. I have to say it was not as easy as it looks at first, but I got the hang of it after a few runs.

I removed the temporary zipper and closed up the center back seam. I inserted an invisible zipper in the left side seam after fusing interfacing along the left side seam allowances. I attached the collar and tried the dress on. Here is how it looks with the collar.

click for a larger image in a new window

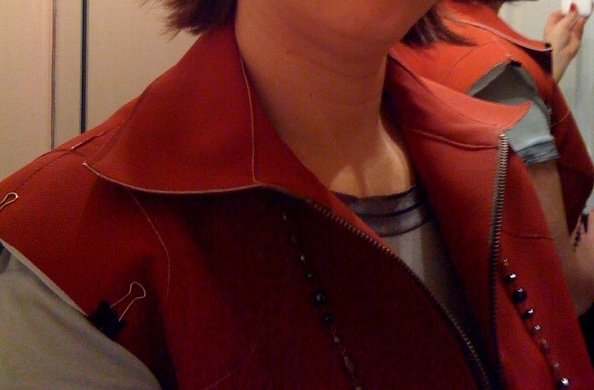
I know I said I was going to line the dress if it turned out I need to wear something underneath it, but I am just dreading that whole process and not loving the dress enough to want to put that much effort into it. So, I cut the one piece facing. I stay stitched the neck and armsyce seam allowances a mere needle's with away from the seamline. Then I finished the edges with Hug Snug. I attached the facing at the neck edge, clipped, understitched, and pressed the seam. It was looking great. Then I clipped the armsyce seam allowances and pressed under to the stay stitching on both the facing and the dress. I basted the pressed edges, clipped them together with binder clips, and edge stitched the facing to the dress along the left armsyce - the side with the zipper. I was a bit annoyed that the dress armsyce length was longer than the facing. I stay stitched it and I didn't think it would stretch after the stay stitching. Maybe I didn't turn the facing under enough? I didn't really think much about it beyond my initial annoyance that I expected it to be perfect and it wasn't. By the time I pressed it, I was quite pleased with how nice and flat it came out and how even the edge stitching came out.

At this point, I was ready for a break. I was thinking, I'll finish it up tomorrow. Smiling to myself about being almost finished and ready to start another project, soon, I picked up the shaped wooden coat hanger I have been using to hang the dress on and got ready to set it aside until tomorrow. Well, the smile didn't last too long, as I noticed the dress seemed to hang funny on the hanger. I fiddled with it and tried to make it look pretty, of course dropping it off the hanger more than once while I was at it. I began to realize that the facing was "not right". I think it is rotated slightly in the armsyce. I need to take it apart and redo it. AAAaaaarrrrrrrghhh! I am too tired and discouraged to fix it today. I'll take it apart next time I sew. Sorry, I was in too crabby a mood to take and post pictures of it. I'll do that when I m not disgusted with myself....

On a happier note, Faye has nominated me for this award! I have never earned any distinction of any kind for anything sewing related. This is a lovely surprise! Thank you, Faye. You made my day! The requirements for accepting this award are as follows:

1. Place the logo within your blog or post.
2. Pass the award on to 12 bloggers.
3. Link the nominees within the post.
4. Let the nominees know they have received the award by commenting on their blogs.
5. Share the love and link to the person from whom you received the award.

So here are my nominees:
1.A Little Sewing On The Side
2.Two On Two Off
3.Sew Passionista
4.The Sewing Lawyer
5.Ten Thousand Hours Of Sewing
6.Ruthie K Sews
7.A Tailor Made It
8.Adventures In The Art Of Sewing
9.La Sewista
10.Beccabeckstuff
11.Carolyn's Sewing Room
12.Diary Of A Sewing Fanatic

Suit Dress Update

click for a larger image in a new window

I tweaked the shoulder slope and restitched the darts. Now the suit dress looks a little better. I am going to leave the sleeves off, but I have decided that I do want the collar, so I have to move the zipper. The zipper in the center back was basted in just for fitting purposes. I do not want to have a zipper in the center back of the collar. Now that I have the side seams as I want them, I will pull that zipper out and stitch the center back seam. I will put an invisible zipper in the left side seam. The seam is curved and the fabric has a slight stretch to it, so I need to stabilize the seam allowances before I sew in the zipper.

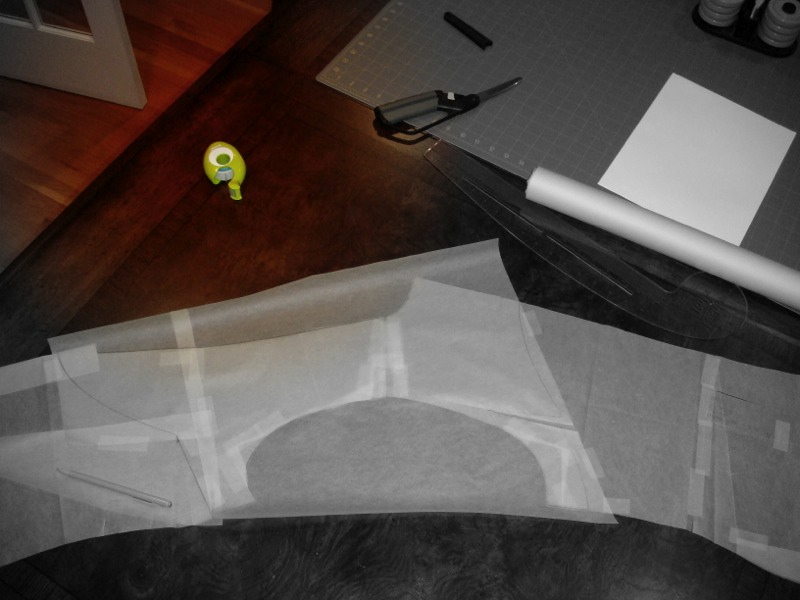
I also have to adjust my facing pattern since I have altered the shoulder seam. This pattern did not come with lining or facing pieces. I drafted my own. It is really easy to do. Since BURDA patterns have no seam allowances, it was especially easy. Basically, all I have to do to make lining and facing pieces is duplicate the front and back pieces, draw a line where I want the facing and lining to meet, and cut the pieces apart.

click for a larger image in a new window

In this picture, I have drafted just a facing. I taped the pattern pieces together at the shoulder, then covered them with architectural tracing paper. I outlined the pattern pieces at the armsyce and neckline and drafted a lower edge to make a one piece facing. The facing will be cut out with the center back on the straight grain fold.

I still have not decided if I am going to make a lining for this dress. It will depend on how low the neckline is once the collar is attached. If I have to wear a blouse or something underneath, I will want a lining to keep the gabardine from sticking to the blouse fabric. If the collar is modest enough, I may see if I have enough fabric to make a shrug to wear over it. I always need sleeves. I am always cold.

The Fitting Struggle Continues...

I had a duh moment and realized I needed to release the fish eye darts. This helped the dress hang much better. I took in the side seams a quarter inch which eliminated 1 inch of the 2 inches of ease through the waist and hip. I think I like the fit more, now, but the darts ... ugh! I am fairly confident I can fix this if I restitch them, curving more and ending tangent to the fold. But now, I am thinking this is just not the right color for me...


Should I Continue With This?

I really hate the way this dress is coming out. I don't like the bubbles at the bottom of the back darts. I think it is too big and baggy looking. The gabardine does not drape the way I thought it would. Maybe it will hang better once it's lined? I really cannot decide whether to keep working on it or to let it "rest" for a while. Sometimes when I hate something and I try to save it, I get really creative and end up truly loving the result. My psychic spidey senses are not seeing good things for the future of this project. I am calling out to all of my fellow sewing fashionistas. What would you do with this?


back view

front view
I tried styling it with a thick knit turtleneck and a wide patent leather belt, but I am just not feeling it.

front view

back view
Here is what the finished dress is supposed to look like. Should I leave it sleeveless? I am afraid there may be just too much azalea gabardine...

technical drawing

from BURDA Style February 2010

Grading BURDA Plus Fashions Down

I really like some of the BURDA Plus size offings the last couple of months. Take a look at these:

February 2010 style number 139
organza ruffled trimmed dress
February 2010 style number 132
gabardine pea jacket
February 2010 style number 139
chanel inspired jacket
February 2010 style number 138
striped shirt dress
February 2010 style number 133
trench coat
February 2010 style number 135A
pin-striped trousers

I may have to just go ahead and experiment with grading. I have never done it before, but BURDA must be reading my mind because they put instructions for down grading in the February 2010 issue. Then the March issue came along with these two styles that I love...

March 2010 style number 132
blue silk dupioni dress
March 2010 style number 130
blue silk dupioni coat

According to BURDA, all I have to do is draw an additional size line on the multi-sized pattern, keeping the same proportion between the new size line and the other sizes. Where there are match points, draw a line connecting all the match points. Measure the distance between two consecutive match points and add the new match point along the connecting line at that same distance. Sounds pretty simple. Has anyone done this? How easy is it?


Suit Dress Muslin


I have my husband to thank for this. It was at his urging that I got up off of the couch at 8:00 last night and whipped up a muslin to test the fit of this pattern. The only alteration made to the pattern is that I added some fullness through the hip and thigh. I think I will go ahead and cut the gabardine with 1 inch side seams and add a little more ease below the waist.

Fitting the Suit Dress

After all of my alterations, the shoulder slope just didn't look right to me. I thought maybe with all the years of folding ready to wear laundry which never fit quite right, finally seeing something that fits me well ought to look odd.

But, just to be on the safe side, I cut the front and back half pieces out, folded the bust dart, and taped the pieces together at the shoulder and side seams before slipping it on to test the fit. It turned out the shoulder slope alteration was good, but the bust dart was too high, and the waist was also too high all the way around, so I undid the tuck I made to petite the armsyce, but then the shoulder didn't lay right. Then I undid the shoulder seam alteration, and now it looks like this.


This looks fine to me.  Maybe I should make a muslin?  I sure wish I had a TNT sheath dress!

How to Petite a BURDA pattern

Love the regular sized pattern but need a petite version?
Here is how I petite a BURDA pattern.
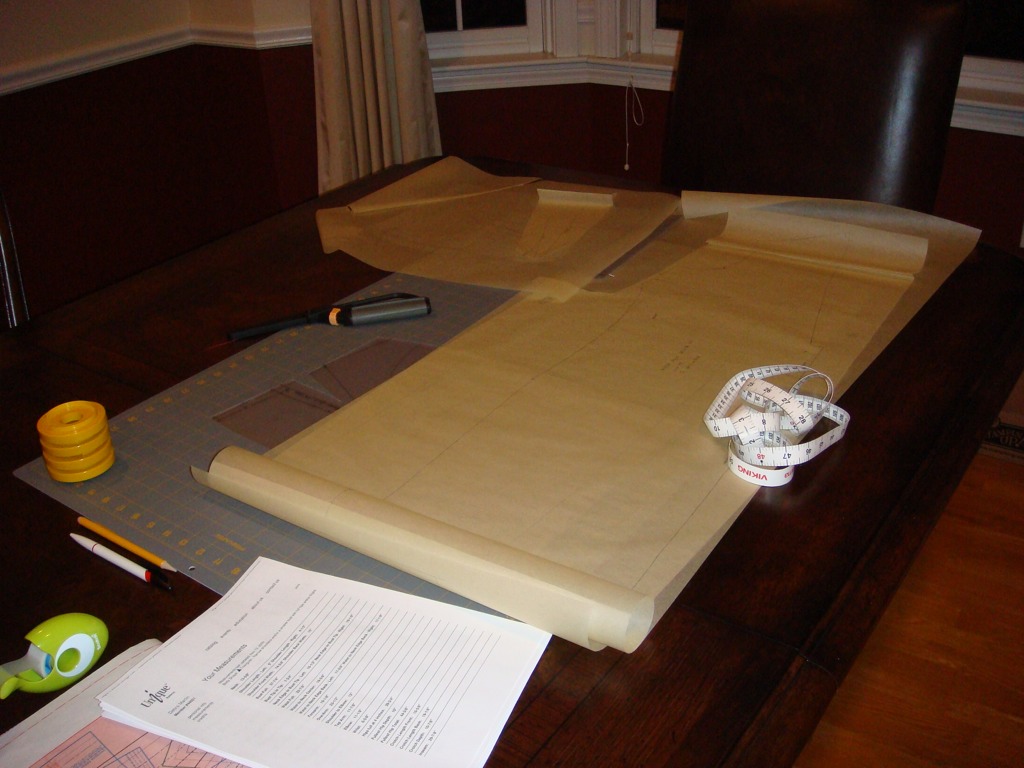
drafting table & supplies

I have a copy of my measurements, my pattern traced on tissue paper with no seam or hem allowances, a tape measure, a pen, some adhesive tape, and a French curve handy on my drafting (dining room) table.  I also use a gridded mat and a TNT (tried and true) skirt pattern cut from a plastic quilter's template sheet. 

In my case, I only need to petite the front piece, but the technique is the same except for the sleeve piece which I will explain later.  First, I compared my bust tip to waist measurement.  The waistline is marked on my pattern, but the bust point is not marked.  I extend the center line of the dart about 1/2 inch and that is what I use for the bust point.  My bust span is about 8 inches, so I check to make sure the bust point is about 4 inches from center front.  I usually need no petite adjustment in the area from bust to waist, but I check it anyhow.  In this case the pattern was a match so I made no adjustment.  If you need to adjust this area, you would pinch a fold just above the waistline to make the bust to waist measurement of the pattern match the length of your body.  You would do this for both the front and the back, pinching the same amount on the back piece so the side seams would be equal.
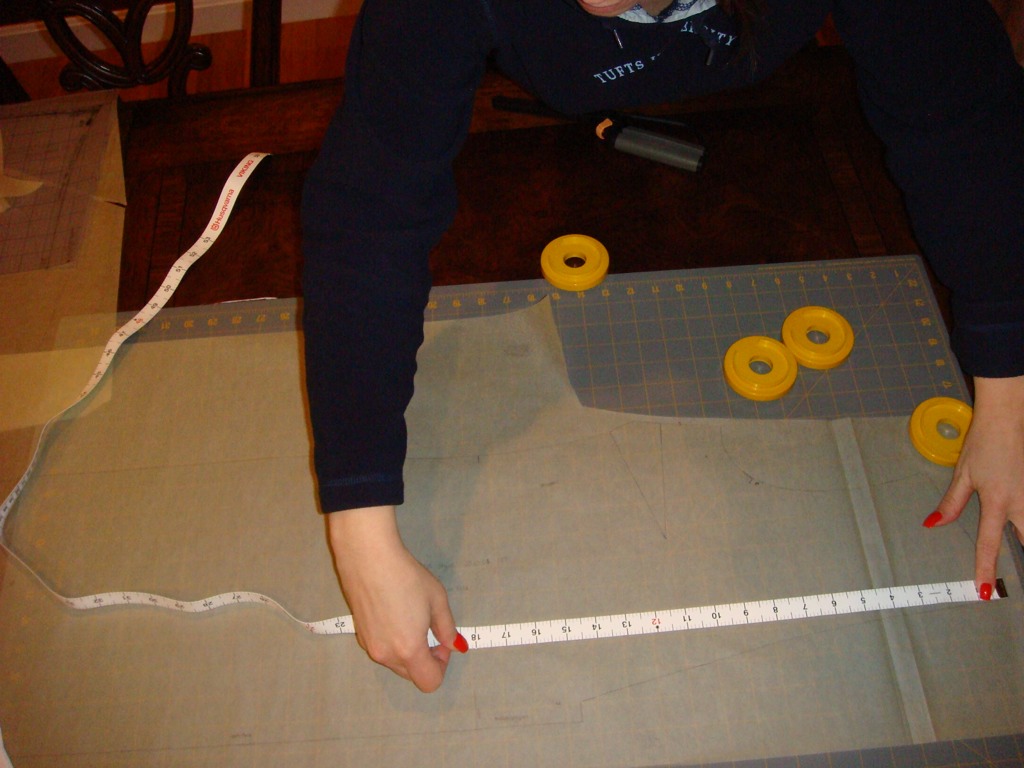
neck to waist front measurement


Next, I measured the pattern from the neckline at the shoulder seam to the waistline, and compared with my measurements.  (I could also have used neck/shoulder to bust point - either would have been fine - but since the waistline is more clearly defined, I chose that method.) 
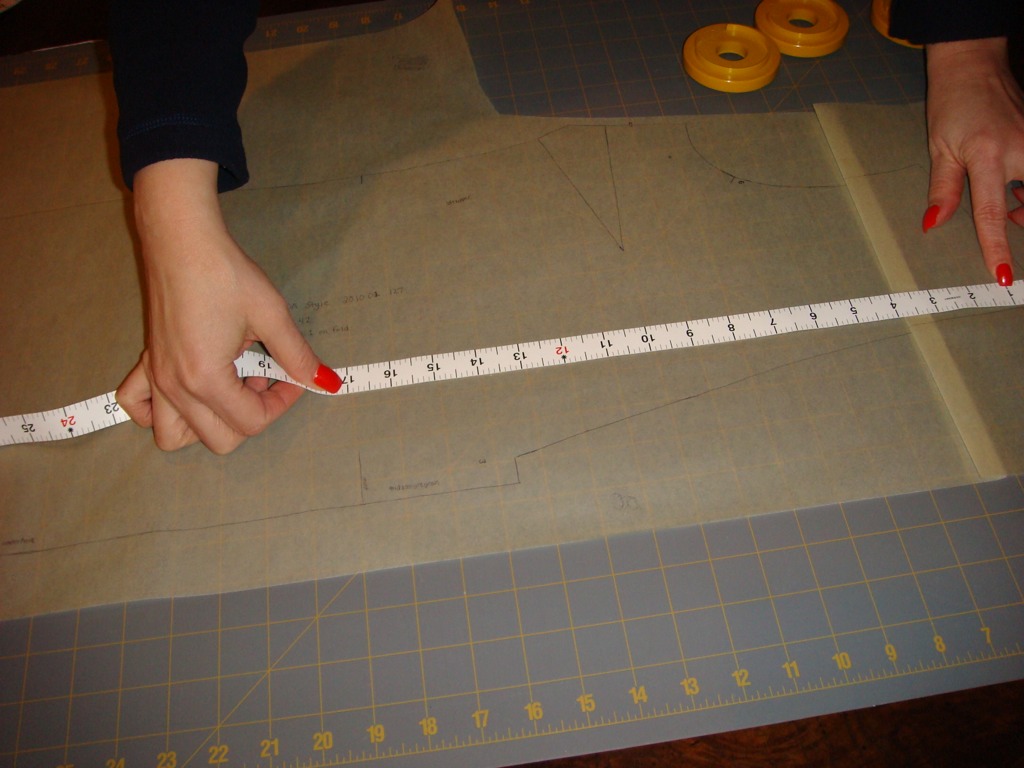
post alteration measurement


The pattern is too long, so I made an adjustment by pinching a fold above the bustline, and smoothing out the seamline at the armsyce and the neckline. If I needed a petite adjustment in the back, I would pinch the same amount from the back pattern piece and smooth the center back and back armsyce seams, but this is not necessary for me, so no adjustment was made to the back.  The lapel and sleeve pattern pieces needed corresponding adjustments after this alteration.
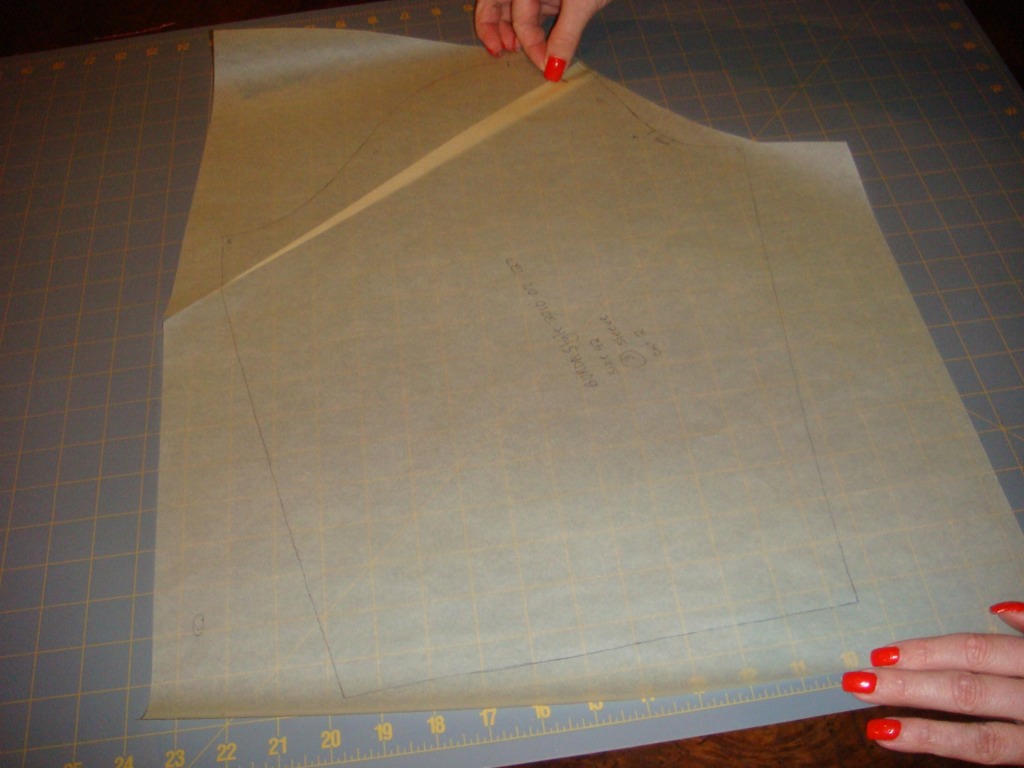
sleeve alteration


To adjust the sleeve pattern piece, I lined the sleeve seamline up with the armsyce at the front match point and rotated the sleeve along the seamline until I reached the fold on the front piece.  I pinched an identical fold on the front side of the sleeve, tapering to nothing at the back of the sleeve (since I made no adjustment to the back piece).  Now the shortened sleeve pattern piece will fit the adjusted (smaller) armsyce.  If your petite adjustment affects both the front and the back pattern pieces, you will pinch a horizontal fold all the way across the sleeve piece to fit your new smaller armsyce.
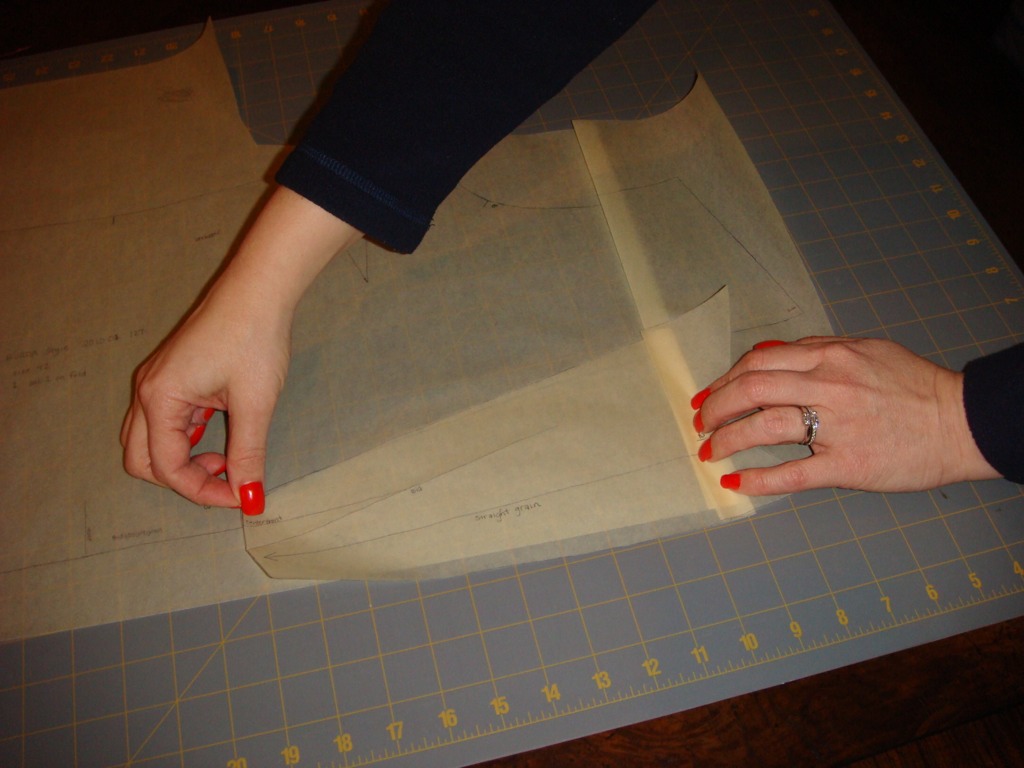
lapel adjustment


Next, I adjusted the lapel pattern piece.  I laid the lapel pattern piece on the front pattern piece along the neckline opening matching seamlines.  I pinched a corresponding amount out of the lapel in the same place where the neckline was shortened by the petite adjustment on the front pattern piece.  Now the shortened lapel will fit the new altered (smaller) neckline.

Other adjustments made to this pattern:

I find BURDA patterns are drafted with shoulders which are an inch wider than my shoulders.  Also, my shoulders slope a little more than normal, causing unflattering wrinkles in the front and back of ready to wear clothes. So I integrate two adjustments in one step - shortening the shoulder seam and adjusting the shoulder slope.

I took a fitting class taught by Cynthia Guffey at the Sewing and Quilting Expo which has helped me to identify and fix my shoulder slope problem.  If you ever have an opportunity to attend a class or a workshop by Cynthia, do it!  She is meticulous.  You may not always want to bother making perfectly fitting clothes for yourself, but you will know how to do it when you DO want to bother.  (Personally, I ALWAYS want to bother, but I am picky picky picky.)  Everything she teaches is available on DVD, so you can relax, put your pencil and notebook down, and just pay attention,learn, and enjoy.  She is really fun in class, as well.  You will laugh, and I promise, you will have several "ah-HAH" moments.  She showed me how to figure out what she referrs to as shoulder slope.  In order to fit me perfectly, the shoulder seam on my back pattern piece needs to have a slope to it which allows the shoulder point to be 1 1/8 inches lower than the neckline at center back.  No matter what I make, a jacket, a blouse, a t-shirt, if there is no shoulder pad, I need this same slope on that back pattern piece!  (If the pattern has a different shoulder seam as in a tank top that does not go from jewel neckline to shoulder point, the slope or angle is still the same.) 
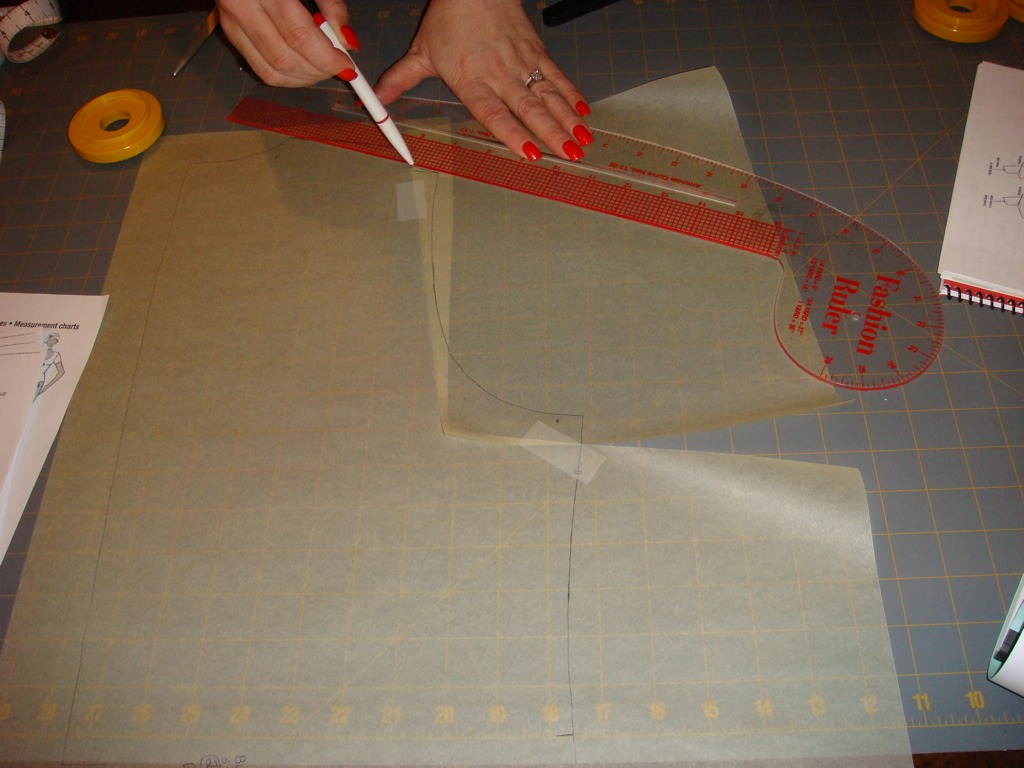
shoulder adjustment


Whatever I have to do to my pattern piece to get that slope in the back, I repeat it for the front.  In this case, I had to lower the shoulder.  I started by cutting the pattern piece from close to the shoulder point to just below the armsyce.  I dropped the shoulder point to 1 1/8 inches below the neck seamline at center back, matched the side seam, and slid horizontally until my shoulder seam measurement matched my body measurement of 4 3/4 inches.  Then I held that shoulder point down and pivoted until the side seams matched up so I would not alter the side seam.  Next, I redrafted the shoulder seam.


The final pattern adjustment involves redrafting the side seams along the hip line.  I slipped my TNT skirt front pattern underneath the dress front pattern tissue and matched up the waistlines.  Then I redrafted the side seam to match the TNT.
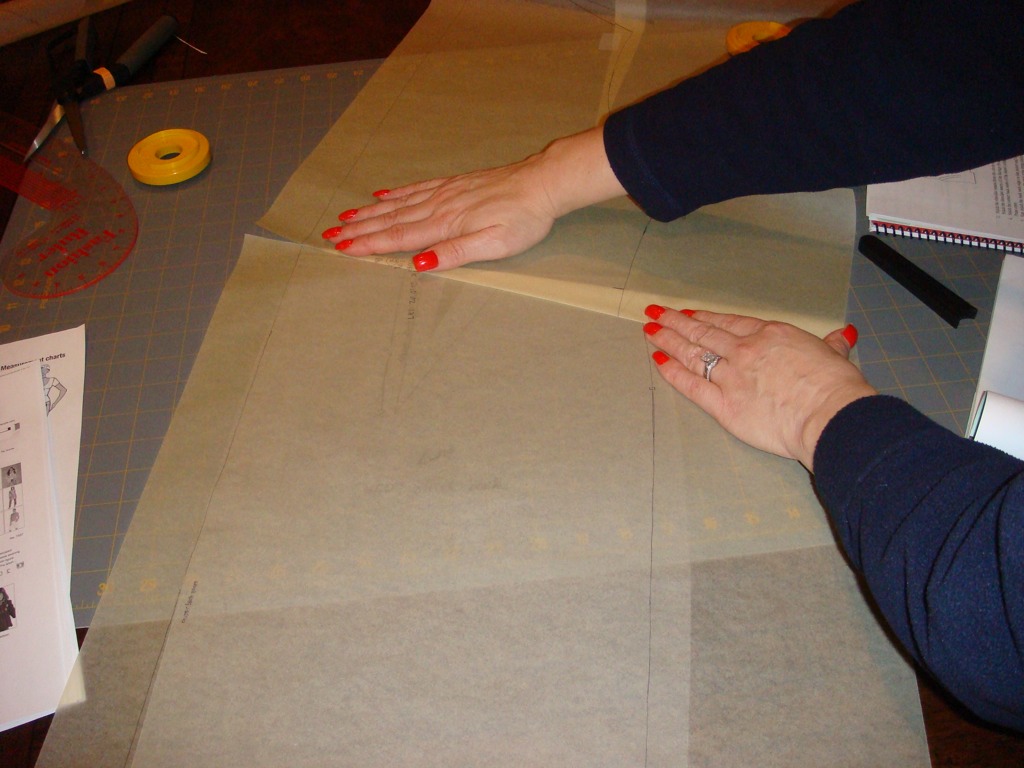


sway back adjustment


For the back, I need a sway back adjustment.  It looks like this if I
use a one piece back.  In order to keep the grain line straight, I cut
the pattern apart at the waist and keep the upper part of the pattern.
I use my TNT skirt back for the lower part of the dress.  I will pin fit the dart with help from a DD or DH during the final fitting.


There you have it - my pattern alterations for the suit dress :)  Now, do you see why I have reservations about MARFY patterns?  I do love the designs, but I am challenged when it comes to alterations.  I guess I could rationalize that I *need* the practice...


What are your alterations?
The Suit Dress

I ordered this beautiful azalea wool gabardine suiting from vogue fabrics today.
It is for the yummy yellow dress from the February 2010 issue of BURDA Style.  The pattern is very simple, so it will showcase the lovely drape of the gabardine. 

I am thinking of embroidery for the collar, and a self belt with a little embroidery as well.
Picture something with minimal thread coverage and maybe a few swarovski crystals.  I will report back after reviewing my embroidery designs.


Meanwhile, the leather skirt is still on the sewing table and will hopefully be finished before I get too involved with the planning of my next project.


My new year's resolution to focus less on work has suffered a minor setback as I worked both Saturday and Sunday this weekend, but I think I will ask for a day or two off midweek next week to stay home and sew.  That would be terrific!  A whole day or two to myself....

Leather Jacket Sew Along

Last fall, I participated in a fun sew along on line at artisanssquare.com.  This was my first time sewing leather - actually it was faux leather.  I have never sewn real leather.


Here is the pattern I used:


BURDA Style petite jacket


technical drawing


It is from BURDA Style magazine October 2009.  It is a petite sized pattern.  I cut size 21. 


This project held a few firsts for me.


    * sewing a material which will have permanent needle holes

    * using fabric glue

    * bagging a lining

    * using lapped seams

    * attaching a collar with a collar band

    * pressing a fabric which will melt if touched with the iron


    Some of these things posed bigger challenges than others for me.


    sewing a material which will have permanent needle holes


  This was especially difficult for me.  I like to baste before I sew. 
I also often take seams apart and resew them until I am satisfied. 
Two things which helped were binder clips and IDT.  IDT is a feature on
some Pfaff sewing machines, which feeds fabric from both the top and
bottom as you sew.  It is like a built in walking foot.  But by far,
the biggest help was using lapped seams.  With lapped seams, I did not
have to sew reverse curves together in the princess seams. I simply
laid one piece over another and sewed.  Well, it wasn't really that
simple.  I marked all the seam lines as the pattern pieces were cut.


stitch sample

    using lapped seams

    The pattern calls for lapped seams, which I really liked sewing. 
See how the backing of the fabric is a white color?  I was worried that
the white would show if I used lapped seams, so I made some test
samples and found it would not be a problem.  I experimented with 
thread color, stitch length and presser foot pressure, and the sample
to the right is what I set my machine up to produce.  I used
contrasting thread for my samples to make it easy to judge the right
tension, and I really liked the the look of the olive color against the
red, so I went with it for the finished version.  I did have some stray
white fibers peaking out of the seams in some places.  I used tweezers
and sharp embroidery scissors to trim them all back.


    Once I decided to use lapped seams, I had some work to do.  The first
thing was to decide which seams would be lapped and which would not. 
For example the sleeve back seam was sewn right sides together.  Once I
decided which seams were lapped, I had to decide which was the underlap
side. Since Burda patterns do not have seam allowances, I had to add
seam allowances to all underlapped pieces as well as those wich would
be sewn right sides together.  I did this by marking the pattern pieces
with dashed lines on all edges which I did NOT want seam allowances
added.  When I cut the fabric, I used a rotary cutter with a gauge set
at 2cm (5/8in) to add seam allowances where I wanted them.  I did not
add seam allowances to my pattern pieces.  After the pattern pieces
were cut, I marked seam lines on the right side of all underlapped
seams by tracing along the edge of the pattern piece with a chalk
wheel.  I did not mark the seam lines that would be sewn right sides
together.  Now, I realize I could have cut all pieces with 2cm seam
allowances and trimmed them off the overlap side just before sewing,
but I think the extra legwork made my pattern pieces truer and the
sewing went quicker. The sewing was actually a joy.  Having the seam
line marked on the underlapped side, I just lapped the pieces right
along that line and edge stitched them together.  Additionally, I
drafted the lining from the pattern pieces, subtracting the facings,
and converting seams to darts.  This was easily done since the pattern
pieces did not have seam allowances.
   
    What did I learn?


  I learned how to bag a lining.  I had read how to do it a number of
times over the years, but I never did it by turning the whole assembly
through an opening in the sleeve.
   
    What would I do differently?


  I was challenged by the collar.  Since I was not able to baste, I
have two rows of stitching holding the band to the jacket - One for the
inner band and then another for the outer band.  Next time I sew this
type of collar on faux leather, I will use glue to hold the inner
collar in place.  Then I will have one line of stitches showing where
the outer collar band is attached.  Another thing I will do differently
involves the zipper seams.  Again, I have double stitching in some
areas around the zippers which would be eliminated with the use of
glue.  Normally, I baste and then remove those stitches, but this type
of fabric is incompatible with that method.
   
    *Use fabric glue to baste where necessary
   
    What I will definitely do again?
    *use binder clips
    *mark underlapped seam lines
    *make samples to determine stitch length and presser foot pressure
    *use low heat and a thick press cloth and press test samples
    *draft a facing for the peplum
   
 
This leather jacket sew-along was a fun project for me.  The
encouragement, advice, and praise from all of the women on artisan square was wonderful. 
It was like having a bunch of friends in my sewing room with me as I went along.


Here are some pictures of my progress


assembled back


The first thing I assembled was the full back.


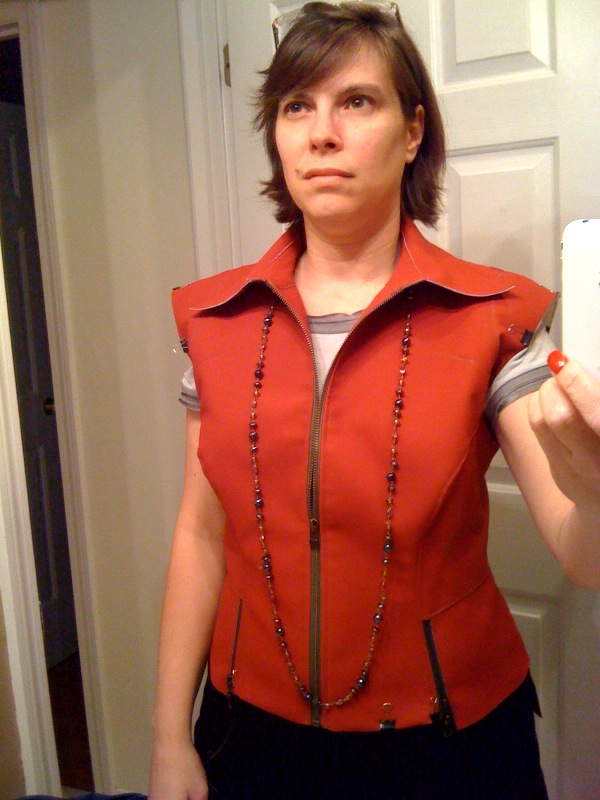
without collar and sleeves


Then the fronts with their zippers, the side seams and the shoulder seams...


with collar

Next came the collar...
 
front with collar


all finished


...then the sleeves and the lining.


back view

silk lining

Here
I have it turned inside out to show the lining.  I used a silk print I
found at the Vogue Fabrics booth at last year's Sewing and Quilting
Expo in Worcester.  (I will not be able to machine wash it. I'll just
use a steamer on the inside and a damp cloth on the leather.)

back lining

If you look closely at the sleeve seam, you can see how big the opening was that I used to turn the lining to the inside.

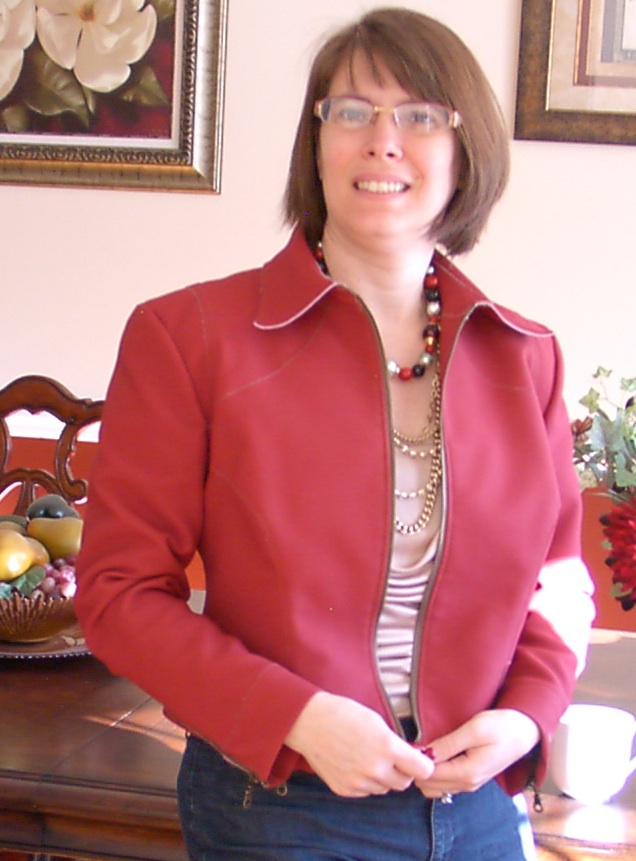
wearing my creation

All finished and ready to go out on the town!

side view

But first I need to finish my coffee!

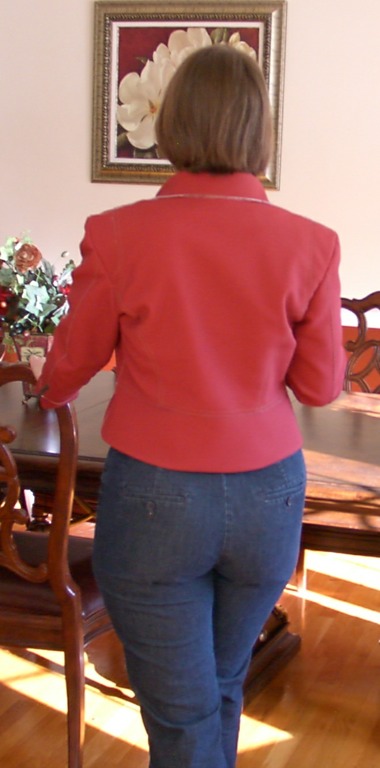
back viewThe
shoulders are a little too wide, but I am happy enough with it to
actually wear it.  Overall - pretty decent fit for ZERO pattern
alterations!!
Now to make a skirt....