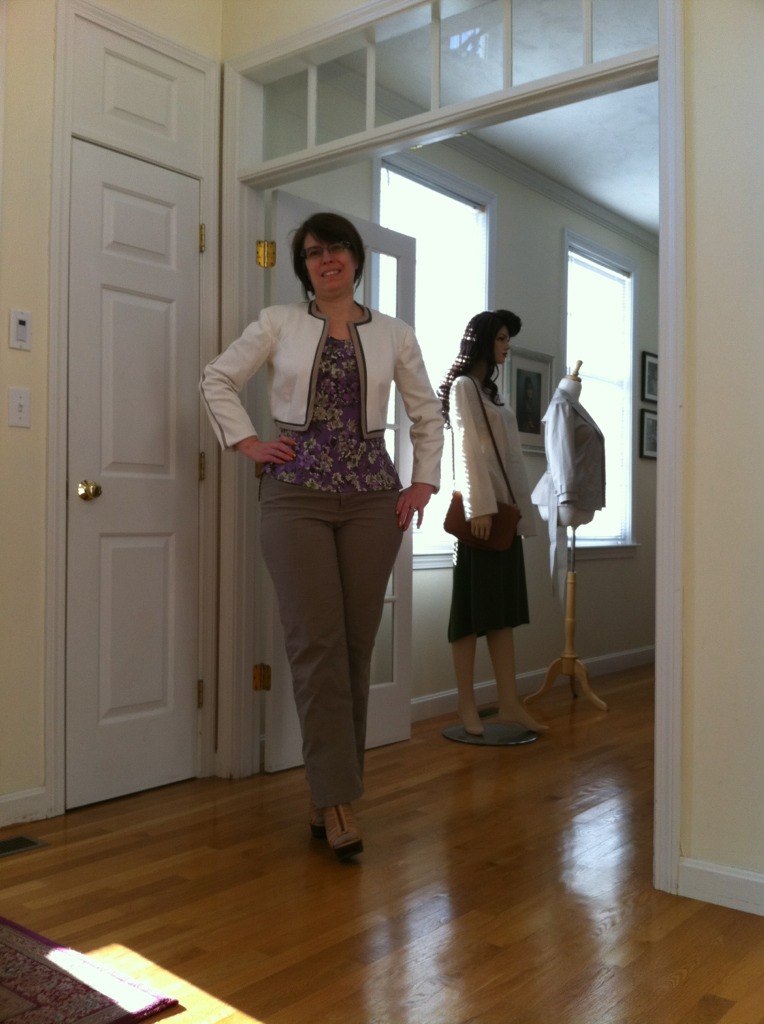
Showing posts with label Pattern Alterations. Show all posts
Showing posts with label Pattern Alterations. Show all posts
Some Things Just Need A Little Time...


Three Piece Sleeve Mock Up
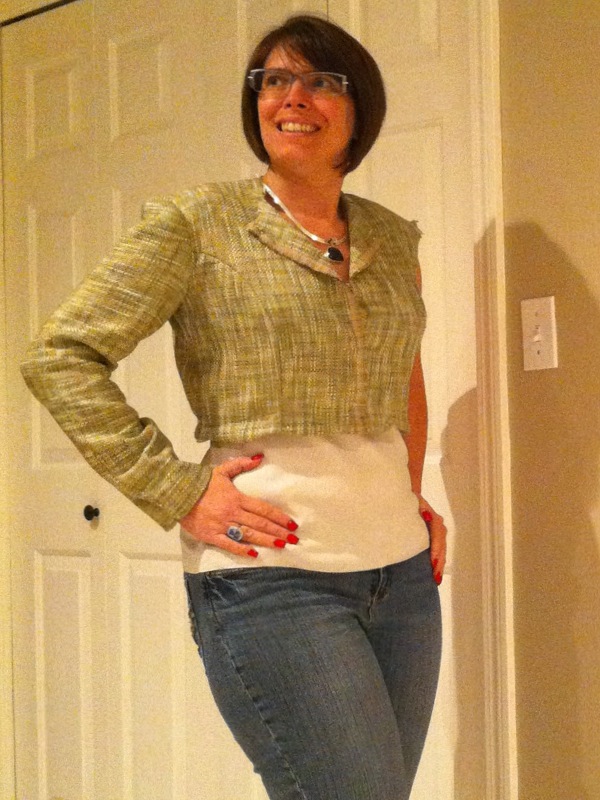
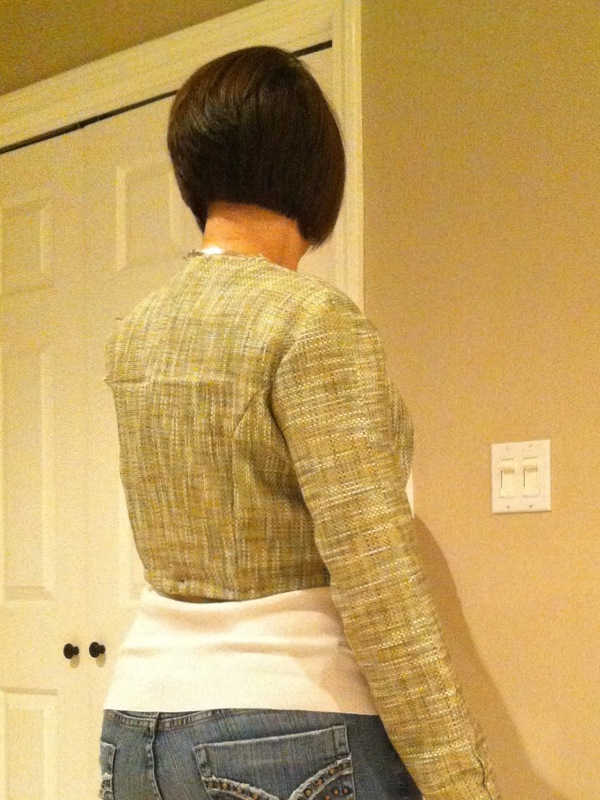
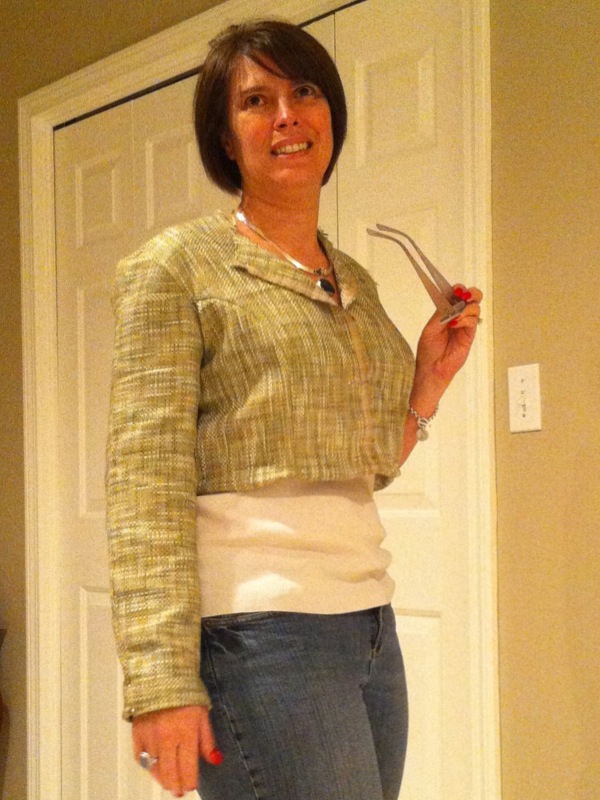 I know I am supposed to put BOTH sleeves in and have a look, but I got so excited after just one, I had to post pictures! Look how nicely it fits!!! If you click to expand the pictures, you will see I have pinned the sleeve vent shut. I can get my hand through the sleeve without opening the vent. I think I am going to make it tighter at the wrist and possibly all the way up to the shoulder. I have other alterations in mind as I morph this Bernina My Label jacket pattern into a cropped Chanel. I'll take pictures as I go and keep you posted. Here is a kind of before and after to whet your appetite.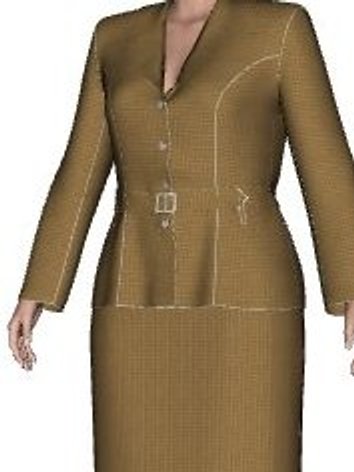
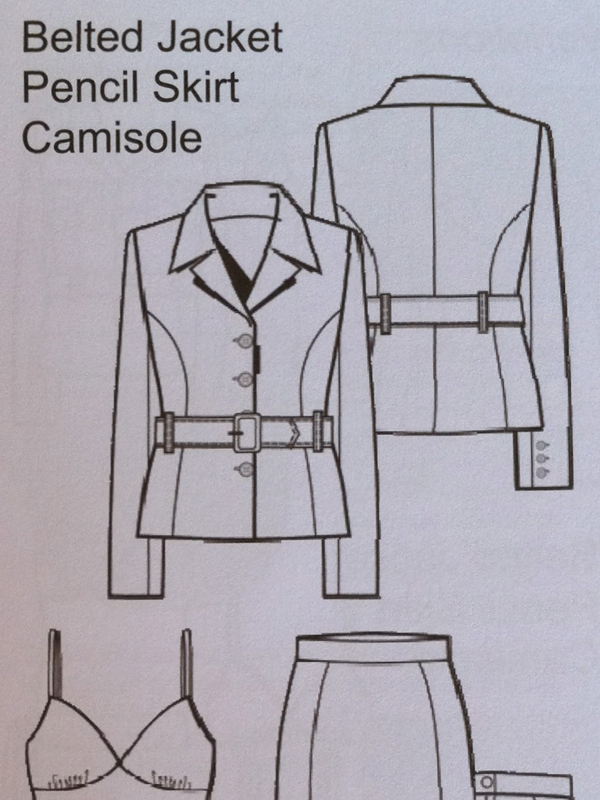
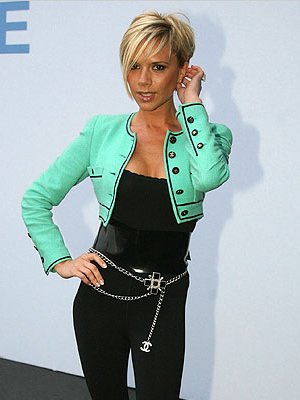
Drafting a Three Piece Sleeve
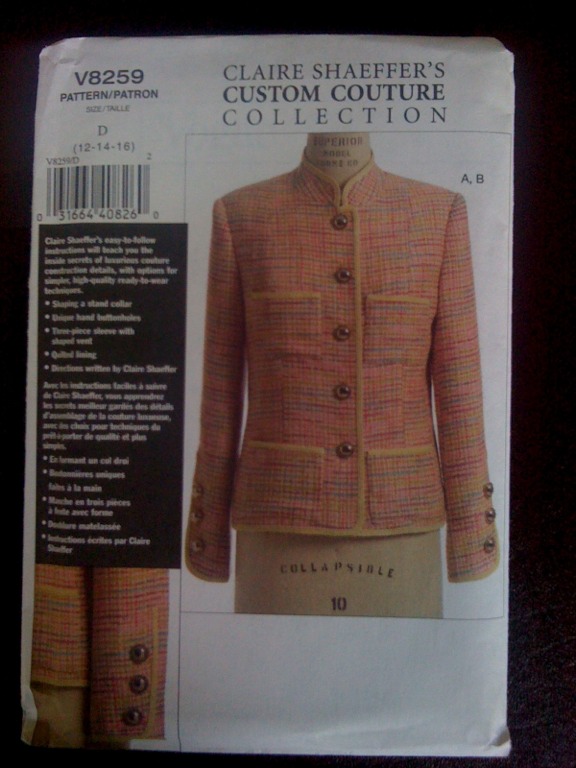
I am pretty sure I want to use a 3 piece sleeve for my Chanel jacket, but the problem is I have a custom drafted two piece sleeve and I am not sure how to convert it to three pieces. I searched my pattern stash, and it turns out, I have Vogue 8529 which has a three piece sleeve. I examined the pieces, and the three seam lines appear to go along the outer arm and about an inch to either side of the underarm. Perfect. Now, I just have to make my two piece draft into a three piece draft.
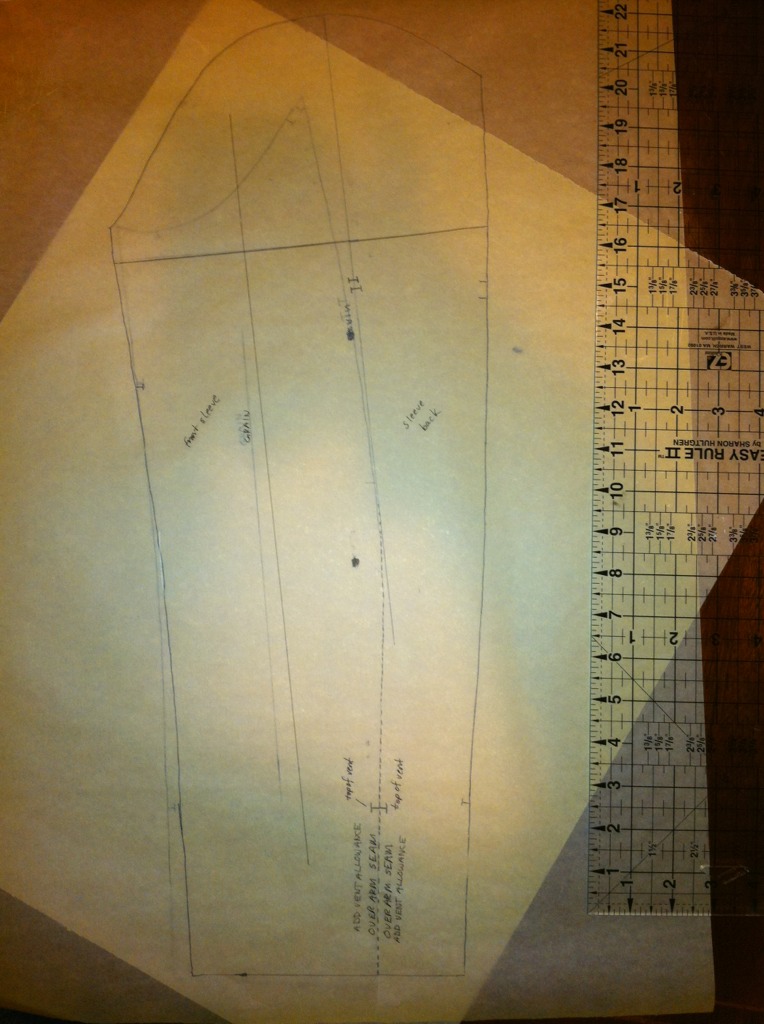
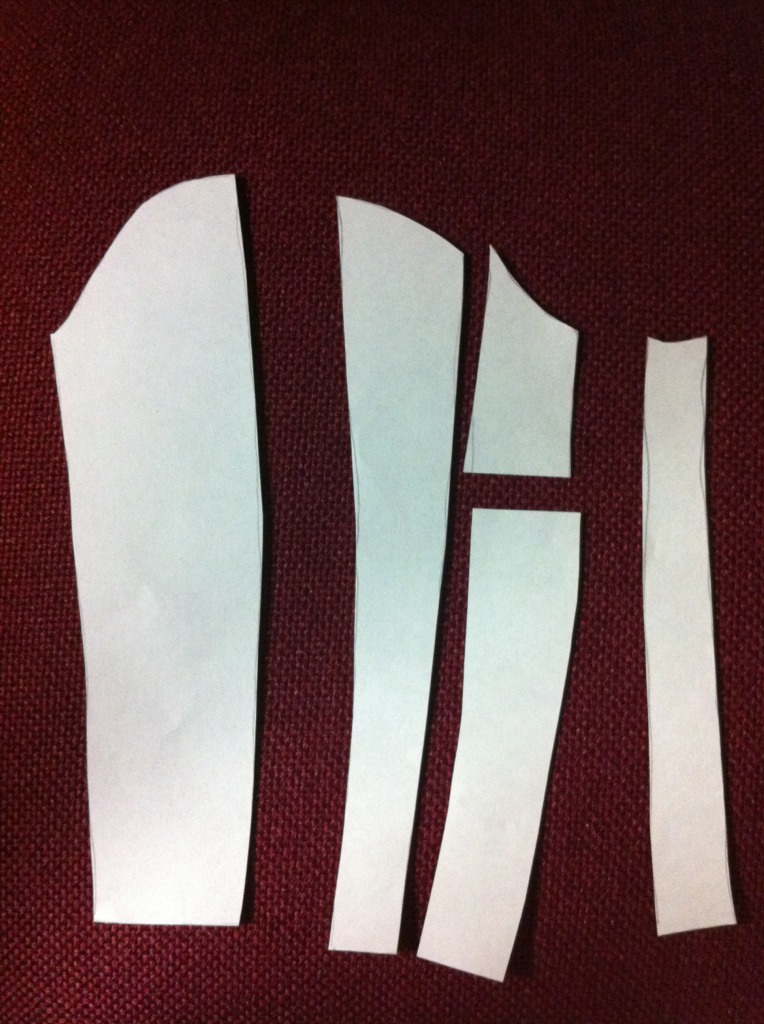
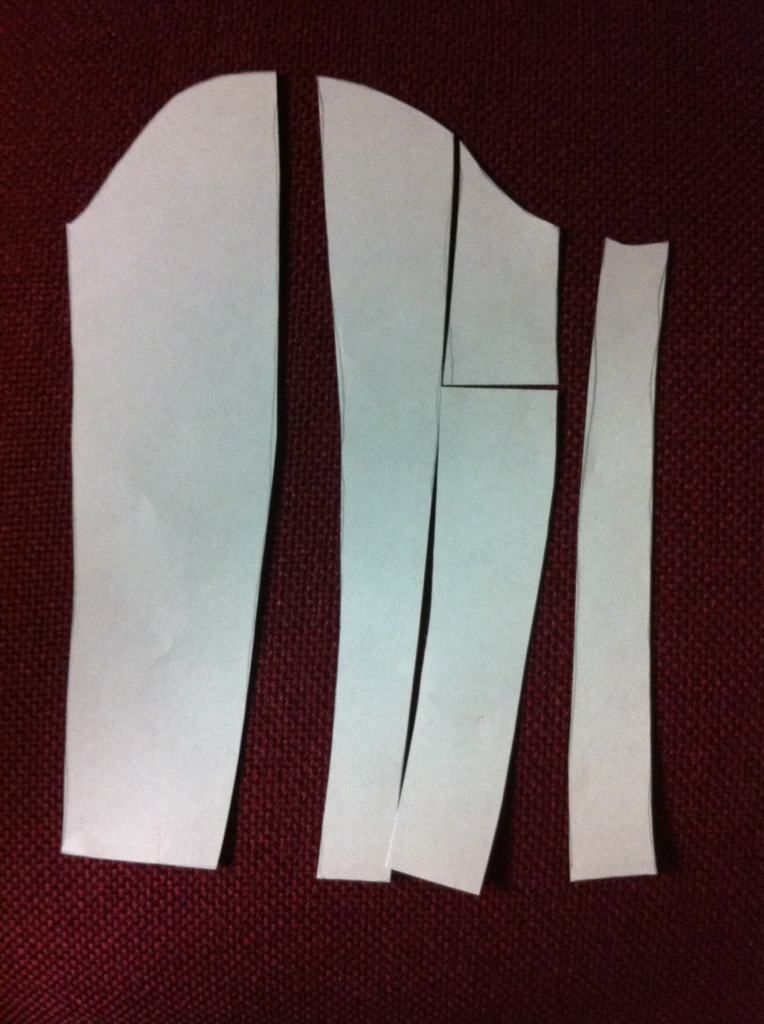
Here is what I did last night. I started with my Bernina My Label jacket sleeve which is a two piece sleeve. I traced it without seam allowances onto tracing paper and marked the grain line. Next, I marked a line perpendicular to the grain line on each piece a little below the curved section at the top of the pieces. I laid the overarm piece on top of the underarm piece wrong sides together and used the angle to help me add a seam line down the outside of the arm.
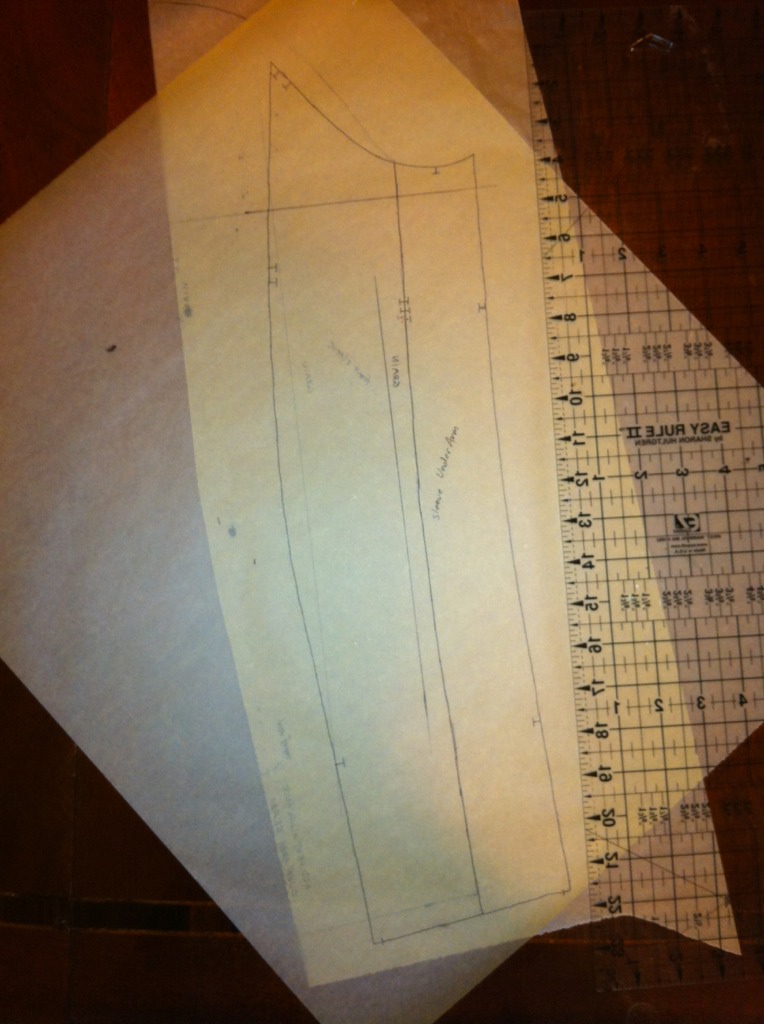
Next, I split the underarm piece so that my new underarm piece is only two inches wide - the same width I will use for my side panels when I alter the jacket side-front and side-back pieces. This left me with four pieces. The next step is to combine the overarm back piece with the underarm back piece.
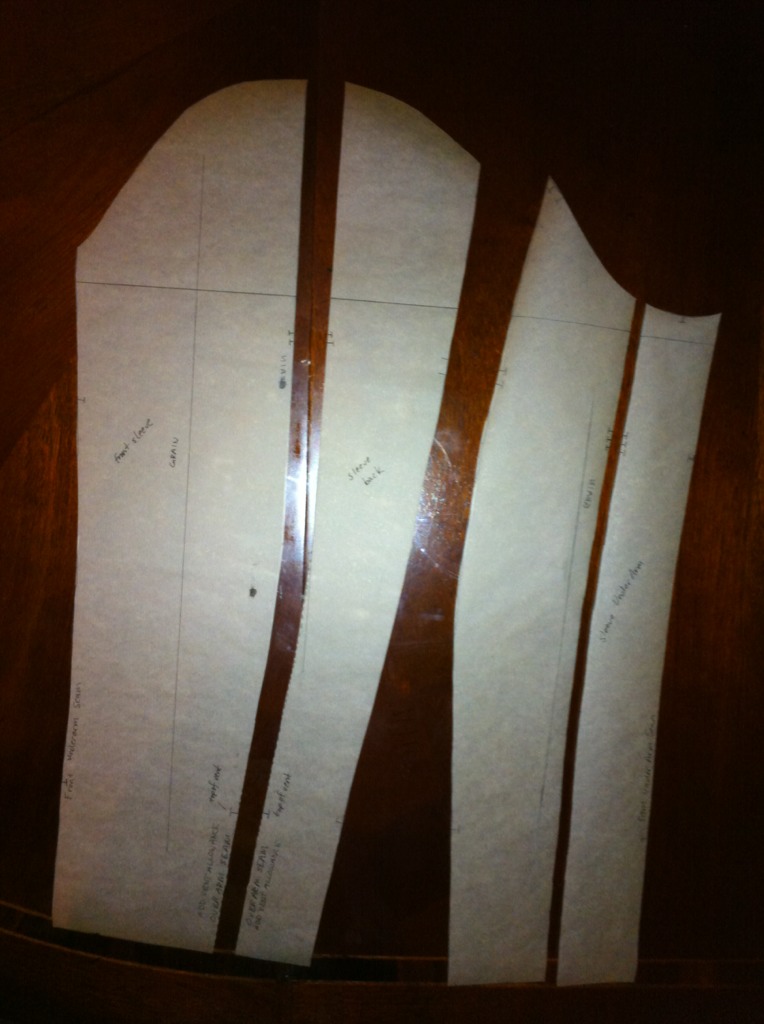
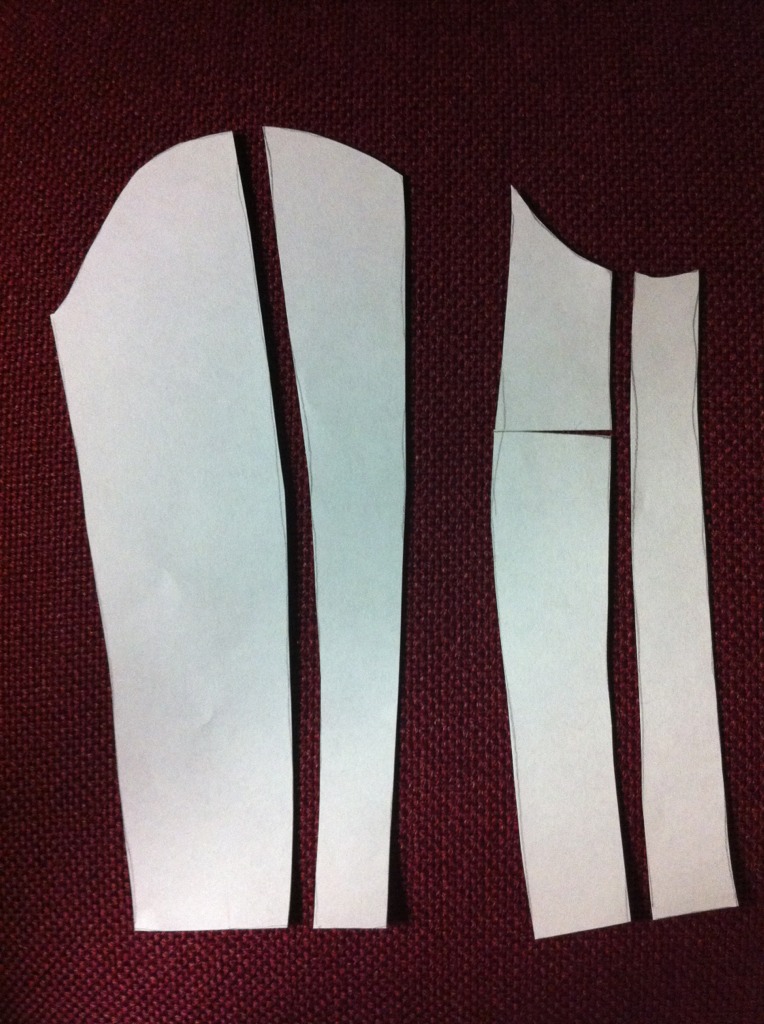
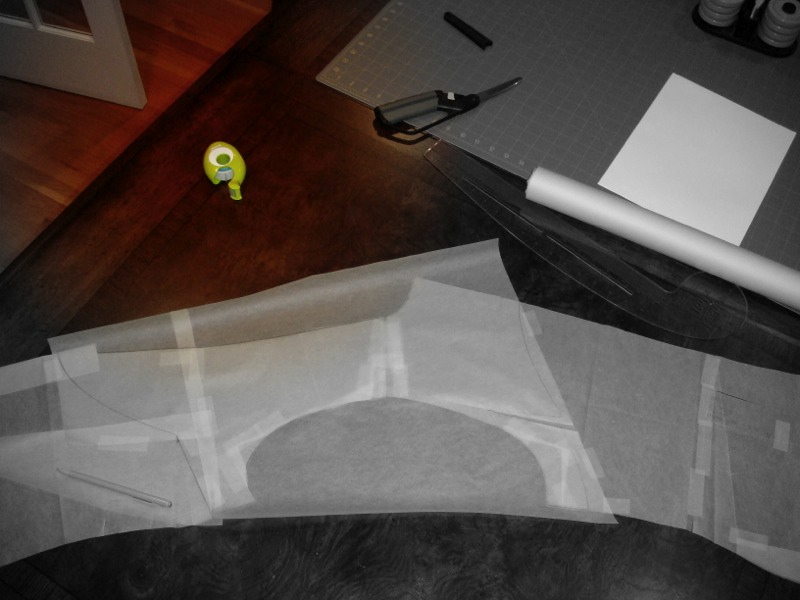
This is where I got stuck. How do I combine the middle two pieces? What happens to the sleeve dart? I am thinking it converts to ease at the underarm seam and the top of the sleeve where it is set in. I think I am going to cut that third piece at the perpendicular line and flip the bottom portion from left to right so that the dart leg becomes the underarm seam when I merge the pieces together.
Understanding a Pants Pattern
I am really trying to wrap my brain around the pant draft. I design three dimensional objects in flat layers for a living, so the ability to see two dimensional objects take shape in three-D is something that I have practiced and developed over the course of the last - well let's just say - large number of years. With all that experience, one would think this would be a cinch. I *will* figure this out! And I will share :)
This is what I have done so far: I traced my RTW pieces onto tissue and cut them out. Next, I used my flexible ruler to get my crotch curve. My waist is level, so I positioned the flexicurve with the waist level. The waistband is two inches long and I will wear these two inches below my natural waist, so the pattern pieces come up to four inches below where the waist is marked on the curve. I widened the legs by adding a half inch to both sides of each piece, giving a total of two more inches in circumference. (After the pants are finished, I will put them on inside out, pin out any extra fullness and then transfer back to the pattern.
- FRONT piece:
- marked the grainline with a fold
- positioned the grainline perpendicular to the waist level line
- taped the pattern to the flexicurve
- scooped out an inch from the front crotch curve
- added the inch back to the hip by slashing and spreading the pattern piece
- added an inch to the extension
- measured from my crotch down to my knee on my body
- marked the knee with a fold the corresponding distance down from the crotch
- marked the crotch depth with a fold
- marked the grainline with a fold
- BACK piece:
- marked the grainline with a fold.
- positioned the grainline perpendicular to the waist level line
- taped the pattern to the flexicurve
- I had to do some folding and some spreading to get the pattern to follow the flexicurve. You can see where I made several abandoned attempts where there are crease lines.
- marked the knee with a fold.(There are two folds at the knee. It's the fold on the bottom. The top one was an abandoned attempt to make the leg go straight after adding to the extension. I am going to remove that addition to the extension. You can still see it in the picture. It is where the crotch extensions overlap.)
- marked the crotch depth with a fold. It's the one on the top. It lines up with the crotch depth of the front piece. The bottom fold is how far below the crotch line the back piece dips. (Actually now that I think about it, the bottom line is the real crotch depth. When I sit down, the inseam of my pant legs is above the level of the chair by about the distance between the two folds. this makes sense to me now as I am processing and typing. I will go and raise the fold on the front piece.)
- folded and trued the dart
- checked the inseam lengths to make sure they are equal
- checked the outseam lengths to make sure they are equal
- checked the total circumferences against my personal measurements at the knee
- checked the total circumferences against my personal measurements at the thigh
- checked the total circumferences against my personal measurements at the bottom edge of the waistband - 4 inches below natural waist
- checked the total circumferences against my personal measurements at the crotch depth
- marked the grainline with a fold.
This is what my pattern looks like. You can click it to make it bigger or see it full-sized here. There is a two inch wide contoured waistband not shown. There are no seam allowances. The back crotch scoops down below the height of the inseam. See that angle to the back? And the center front is off grain. Does this look right? Does anyone else have a back pattern piece that looks like this?
Suit Dress Update
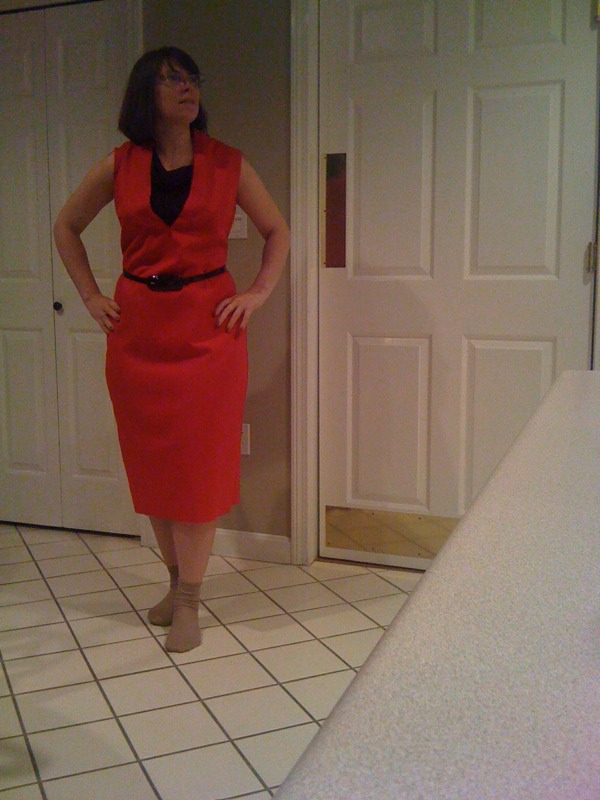
click for a larger image in a new window
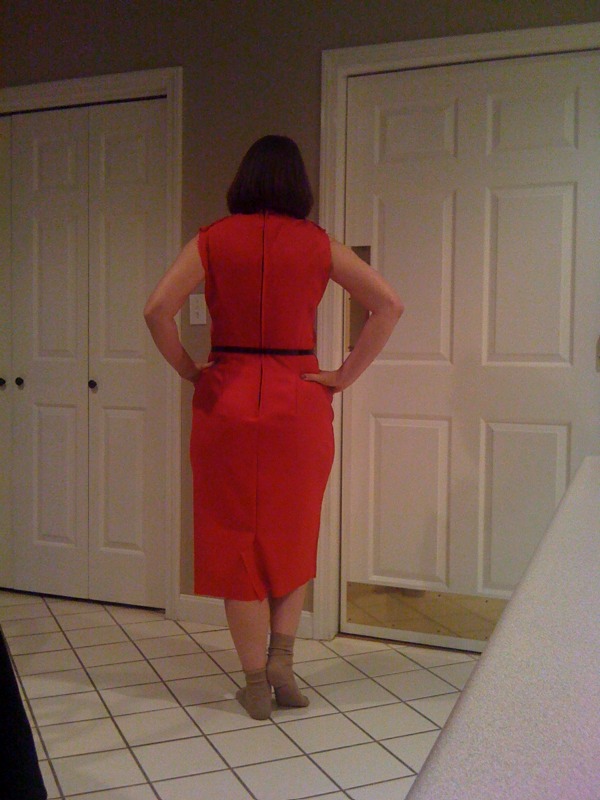
click for a larger image in a new window
I tweaked the shoulder slope and restitched the darts. Now the suit dress looks a little better. I am going to leave the sleeves off, but I have decided that I do want the collar, so I have to move the zipper. The zipper in the center back was basted in just for fitting purposes. I do not want to have a zipper in the center back of the collar. Now that I have the side seams as I want them, I will pull that zipper out and stitch the center back seam. I will put an invisible zipper in the left side seam. The seam is curved and the fabric has a slight stretch to it, so I need to stabilize the seam allowances before I sew in the zipper.
I also have to adjust my facing pattern since I have altered the shoulder seam. This pattern did not come with lining or facing pieces. I drafted my own. It is really easy to do. Since BURDA patterns have no seam allowances, it was especially easy. Basically, all I have to do to make lining and facing pieces is duplicate the front and back pieces, draw a line where I want the facing and lining to meet, and cut the pieces apart.
click for a larger image in a new window
In this picture, I have drafted just a facing. I taped the pattern pieces together at the shoulder, then covered them with architectural tracing paper. I outlined the pattern pieces at the armsyce and neckline and drafted a lower edge to make a one piece facing. The facing will be cut out with the center back on the straight grain fold.
I still have not decided if I am going to make a lining for this dress. It will depend on how low the neckline is once the collar is attached. If I have to wear a blouse or something underneath, I will want a lining to keep the gabardine from sticking to the blouse fabric. If the collar is modest enough, I may see if I have enough fabric to make a shrug to wear over it. I always need sleeves. I am always cold.
Grading BURDA Plus Fashions Down
I really like some of the BURDA Plus size offings the last couple of months. Take a look at these:

February 2010 style number 139
organza ruffled trimmed dress
organza ruffled trimmed dress

February 2010 style number 132
gabardine pea jacket
gabardine pea jacket

February 2010 style number 139
chanel inspired jacket
chanel inspired jacket

February 2010 style number 138
striped shirt dress
striped shirt dress

February 2010 style number 133
trench coat
trench coat

February 2010 style number 135A
pin-striped trousers
pin-striped trousers
I may have to just go ahead and experiment with grading. I have never done it before, but BURDA must be reading my mind because they put instructions for down grading in the February 2010 issue. Then the March issue came along with these two styles that I love...

March 2010 style number 132
blue silk dupioni dress
blue silk dupioni dress

March 2010 style number 130
blue silk dupioni coat
blue silk dupioni coat
According to BURDA, all I have to do is draw an additional size line on the multi-sized pattern, keeping the same proportion between the new size line and the other sizes. Where there are match points, draw a line connecting all the match points. Measure the distance between two consecutive match points and add the new match point along the connecting line at that same distance. Sounds pretty simple. Has anyone done this? How easy is it?
How to Petite a BURDA pattern
Love the regular sized pattern but need a petite version?
Here is how I petite a BURDA pattern.
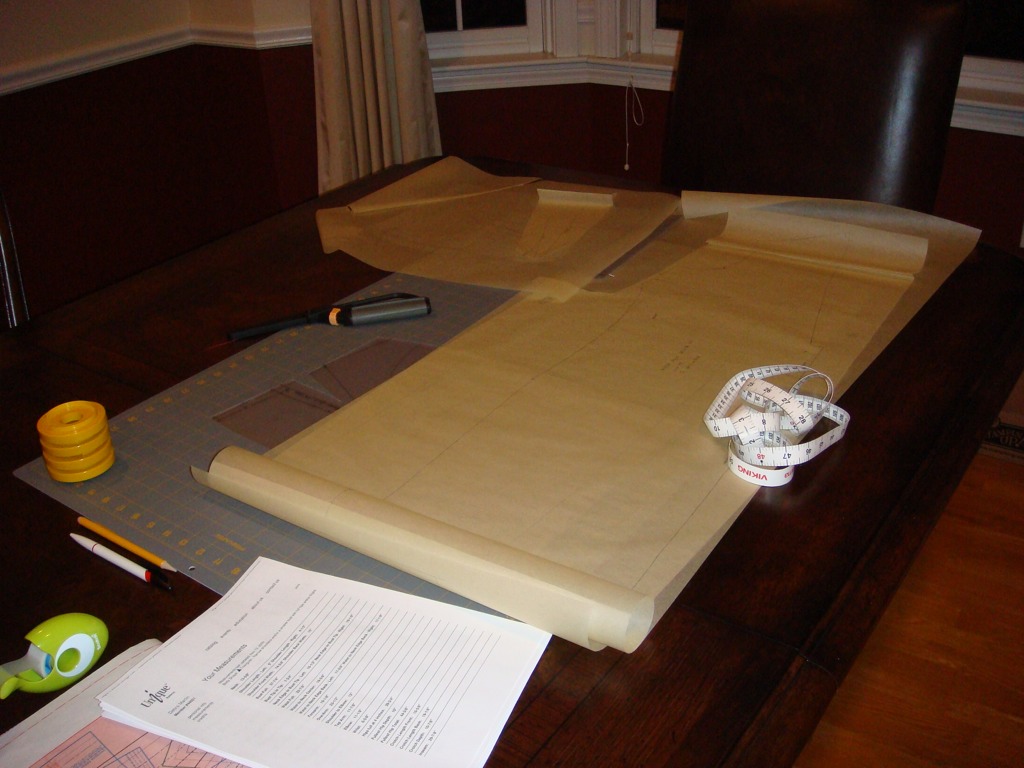
I have a copy of my measurements, my pattern traced on tissue paper with no seam or hem allowances, a tape measure, a pen, some adhesive tape, and a French curve handy on my drafting (dining room) table. I also use a gridded mat and a TNT (tried and true) skirt pattern cut from a plastic quilter's template sheet.
In my case, I only need to petite the front piece, but the technique is the same except for the sleeve piece which I will explain later. First, I compared my bust tip to waist measurement. The waistline is marked on my pattern, but the bust point is not marked. I extend the center line of the dart about 1/2 inch and that is what I use for the bust point. My bust span is about 8 inches, so I check to make sure the bust point is about 4 inches from center front. I usually need no petite adjustment in the area from bust to waist, but I check it anyhow. In this case the pattern was a match so I made no adjustment. If you need to adjust this area, you would pinch a fold just above the waistline to make the bust to waist measurement of the pattern match the length of your body. You would do this for both the front and the back, pinching the same amount on the back piece so the side seams would be equal.
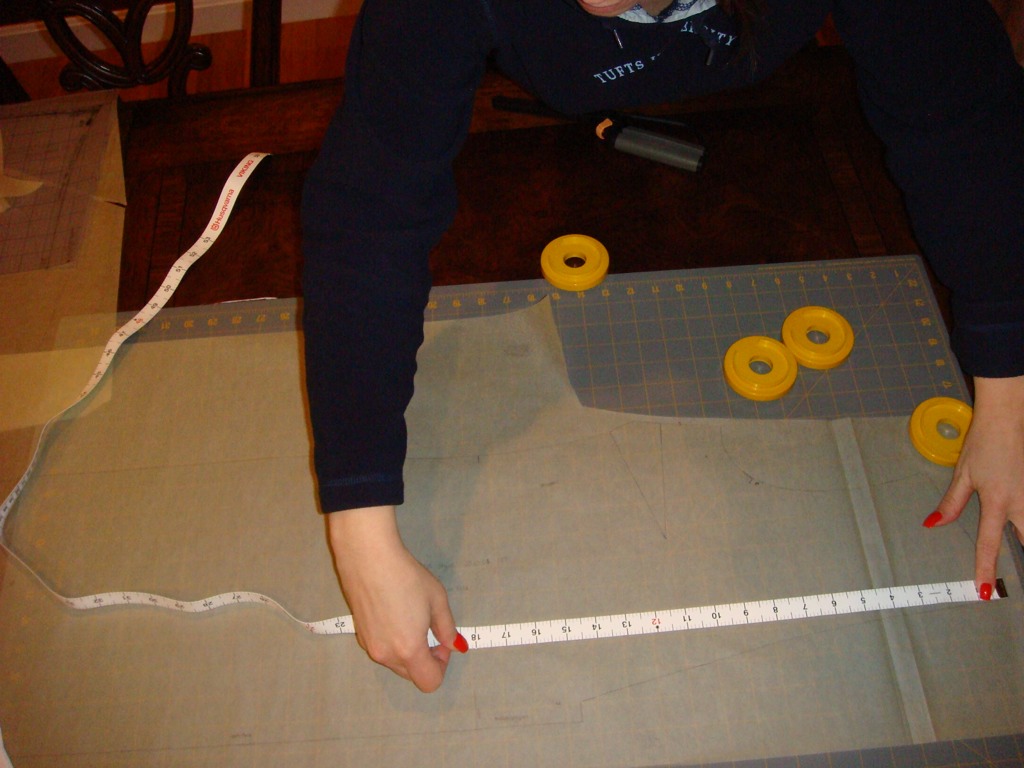
Next, I measured the pattern from the neckline at the shoulder seam to the waistline, and compared with my measurements. (I could also have used neck/shoulder to bust point - either would have been fine - but since the waistline is more clearly defined, I chose that method.)
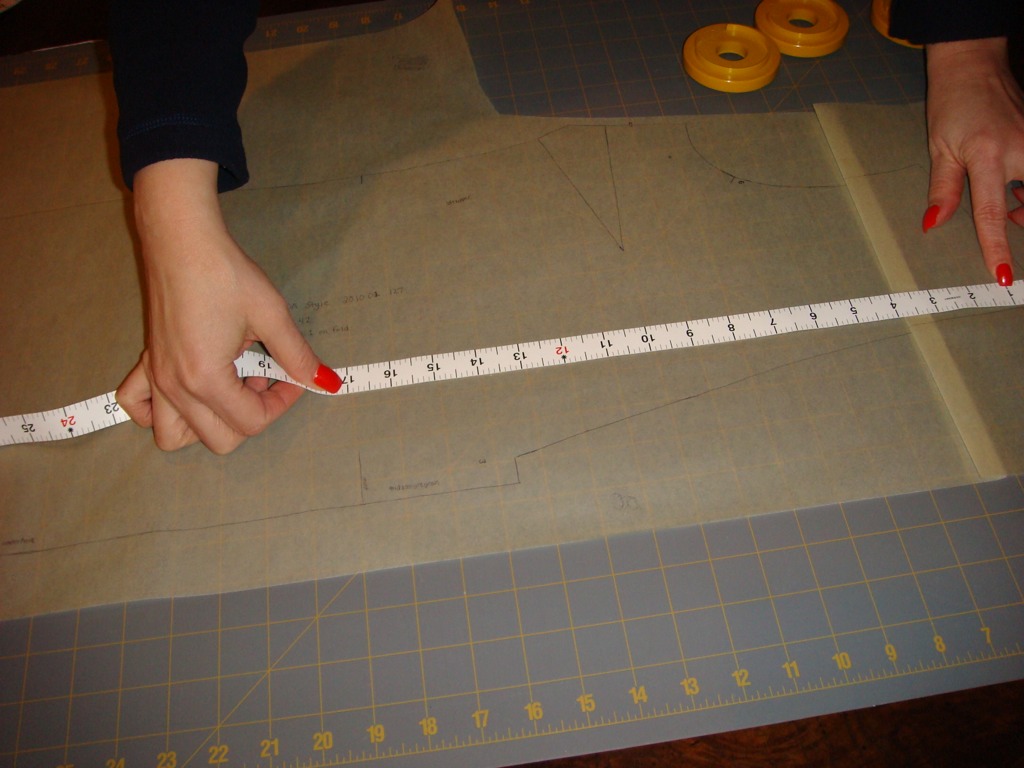
The pattern is too long, so I made an adjustment by pinching a fold above the bustline, and smoothing out the seamline at the armsyce and the neckline. If I needed a petite adjustment in the back, I would pinch the same amount from the back pattern piece and smooth the center back and back armsyce seams, but this is not necessary for me, so no adjustment was made to the back. The lapel and sleeve pattern pieces needed corresponding adjustments after this alteration.
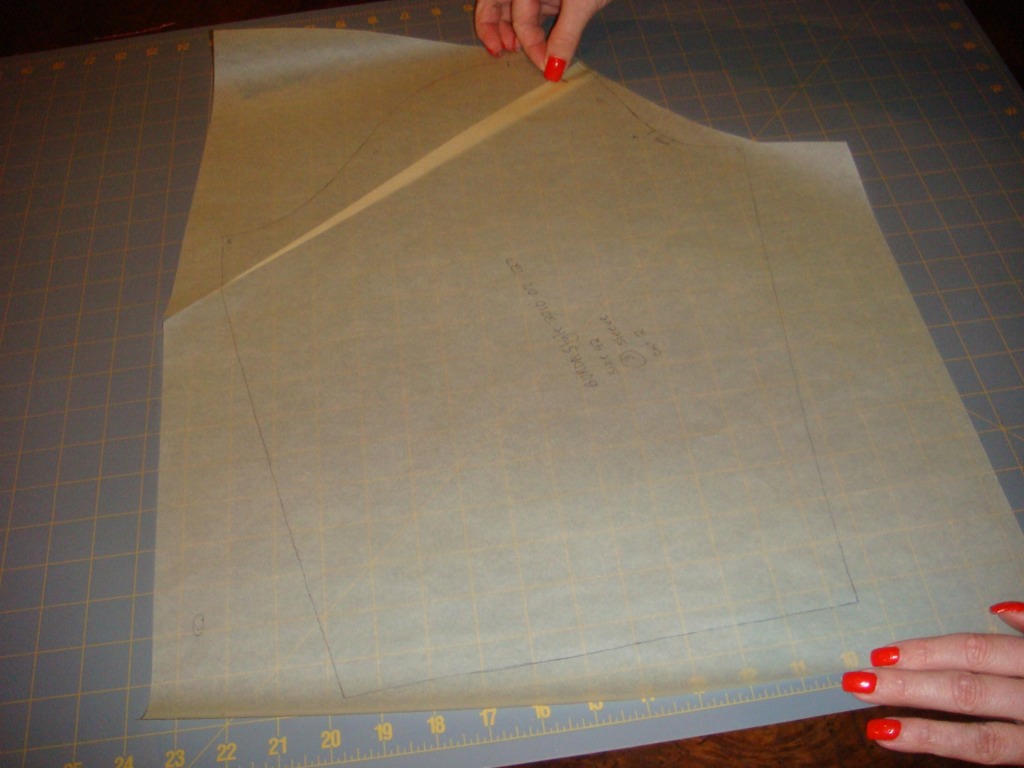
To adjust the sleeve pattern piece, I lined the sleeve seamline up with the armsyce at the front match point and rotated the sleeve along the seamline until I reached the fold on the front piece. I pinched an identical fold on the front side of the sleeve, tapering to nothing at the back of the sleeve (since I made no adjustment to the back piece). Now the shortened sleeve pattern piece will fit the adjusted (smaller) armsyce. If your petite adjustment affects both the front and the back pattern pieces, you will pinch a horizontal fold all the way across the sleeve piece to fit your new smaller armsyce.
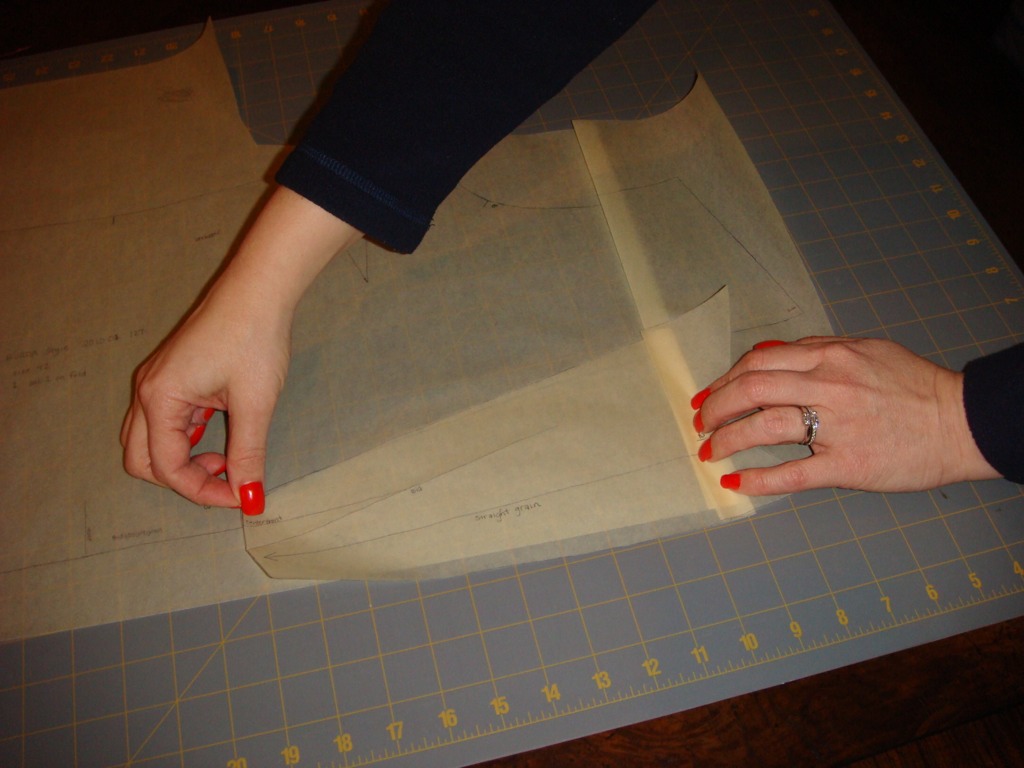
Next, I adjusted the lapel pattern piece. I laid the lapel pattern piece on the front pattern piece along the neckline opening matching seamlines. I pinched a corresponding amount out of the lapel in the same place where the neckline was shortened by the petite adjustment on the front pattern piece. Now the shortened lapel will fit the new altered (smaller) neckline.
Other adjustments made to this pattern:
I find BURDA patterns are drafted with shoulders which are an inch wider than my shoulders. Also, my shoulders slope a little more than normal, causing unflattering wrinkles in the front and back of ready to wear clothes. So I integrate two adjustments in one step - shortening the shoulder seam and adjusting the shoulder slope.
I took a fitting class taught by Cynthia Guffey at the Sewing and Quilting Expo which has helped me to identify and fix my shoulder slope problem. If you ever have an opportunity to attend a class or a workshop by Cynthia, do it! She is meticulous. You may not always want to bother making perfectly fitting clothes for yourself, but you will know how to do it when you DO want to bother. (Personally, I ALWAYS want to bother, but I am picky picky picky.) Everything she teaches is available on DVD, so you can relax, put your pencil and notebook down, and just pay attention,learn, and enjoy. She is really fun in class, as well. You will laugh, and I promise, you will have several "ah-HAH" moments. She showed me how to figure out what she referrs to as shoulder slope. In order to fit me perfectly, the shoulder seam on my back pattern piece needs to have a slope to it which allows the shoulder point to be 1 1/8 inches lower than the neckline at center back. No matter what I make, a jacket, a blouse, a t-shirt, if there is no shoulder pad, I need this same slope on that back pattern piece! (If the pattern has a different shoulder seam as in a tank top that does not go from jewel neckline to shoulder point, the slope or angle is still the same.)
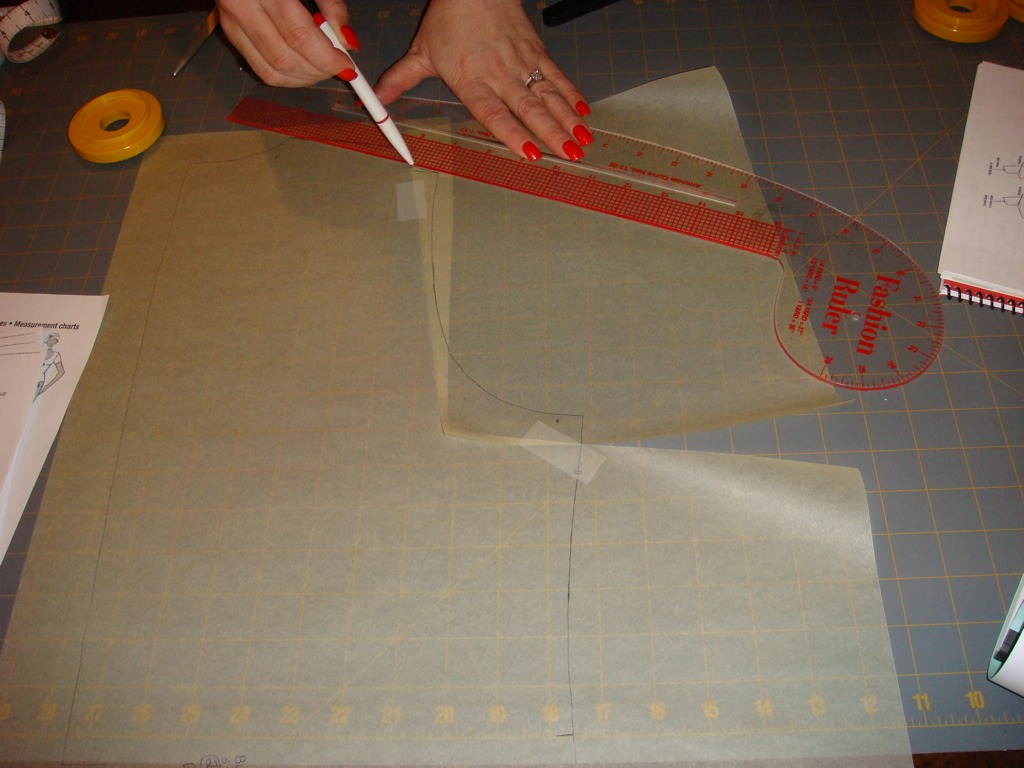
Whatever I have to do to my pattern piece to get that slope in the back, I repeat it for the front. In this case, I had to lower the shoulder. I started by cutting the pattern piece from close to the shoulder point to just below the armsyce. I dropped the shoulder point to 1 1/8 inches below the neck seamline at center back, matched the side seam, and slid horizontally until my shoulder seam measurement matched my body measurement of 4 3/4 inches. Then I held that shoulder point down and pivoted until the side seams matched up so I would not alter the side seam. Next, I redrafted the shoulder seam.
The final pattern adjustment involves redrafting the side seams along the hip line. I slipped my TNT skirt front pattern underneath the dress front pattern tissue and matched up the waistlines. Then I redrafted the side seam to match the TNT.
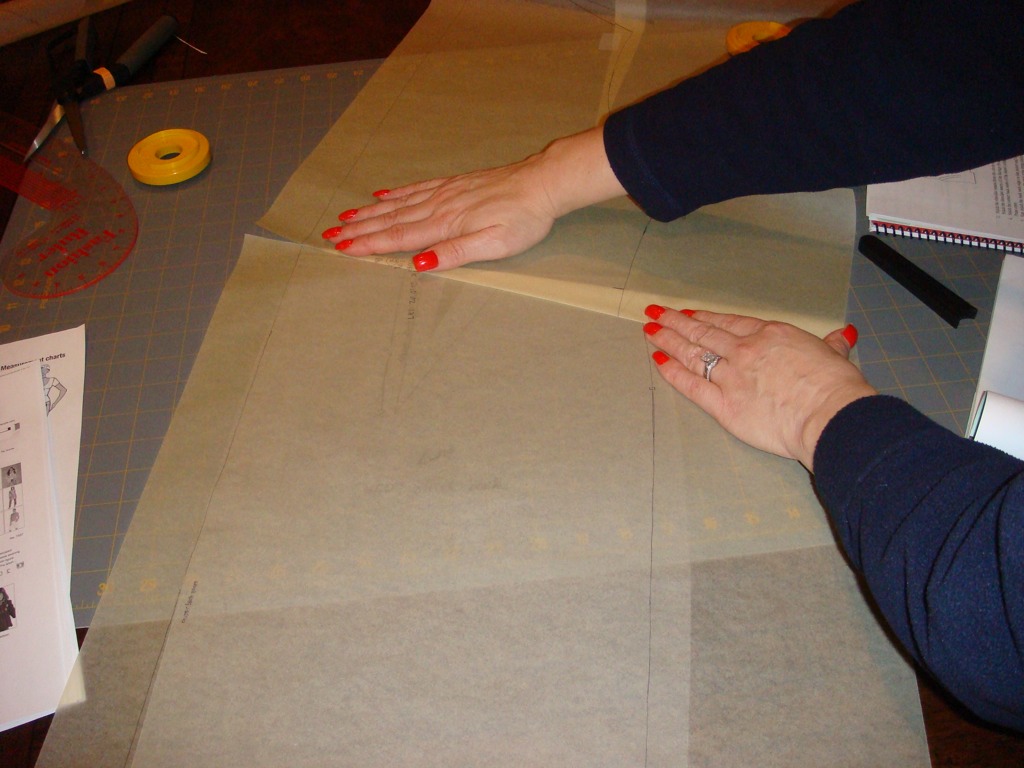
For the back, I need a sway back adjustment. It looks like this if I
use a one piece back. In order to keep the grain line straight, I cut
the pattern apart at the waist and keep the upper part of the pattern.
I use my TNT skirt back for the lower part of the dress. I will pin fit the dart with help from a DD or DH during the final fitting.
There you have it - my pattern alterations for the suit dress :) Now, do you see why I have reservations about MARFY patterns? I do love the designs, but I am challenged when it comes to alterations. I guess I could rationalize that I *need* the practice...
What are your alterations?
Here is how I petite a BURDA pattern.

I have a copy of my measurements, my pattern traced on tissue paper with no seam or hem allowances, a tape measure, a pen, some adhesive tape, and a French curve handy on my drafting (dining room) table. I also use a gridded mat and a TNT (tried and true) skirt pattern cut from a plastic quilter's template sheet.
In my case, I only need to petite the front piece, but the technique is the same except for the sleeve piece which I will explain later. First, I compared my bust tip to waist measurement. The waistline is marked on my pattern, but the bust point is not marked. I extend the center line of the dart about 1/2 inch and that is what I use for the bust point. My bust span is about 8 inches, so I check to make sure the bust point is about 4 inches from center front. I usually need no petite adjustment in the area from bust to waist, but I check it anyhow. In this case the pattern was a match so I made no adjustment. If you need to adjust this area, you would pinch a fold just above the waistline to make the bust to waist measurement of the pattern match the length of your body. You would do this for both the front and the back, pinching the same amount on the back piece so the side seams would be equal.
Next, I measured the pattern from the neckline at the shoulder seam to the waistline, and compared with my measurements. (I could also have used neck/shoulder to bust point - either would have been fine - but since the waistline is more clearly defined, I chose that method.)
The pattern is too long, so I made an adjustment by pinching a fold above the bustline, and smoothing out the seamline at the armsyce and the neckline. If I needed a petite adjustment in the back, I would pinch the same amount from the back pattern piece and smooth the center back and back armsyce seams, but this is not necessary for me, so no adjustment was made to the back. The lapel and sleeve pattern pieces needed corresponding adjustments after this alteration.
To adjust the sleeve pattern piece, I lined the sleeve seamline up with the armsyce at the front match point and rotated the sleeve along the seamline until I reached the fold on the front piece. I pinched an identical fold on the front side of the sleeve, tapering to nothing at the back of the sleeve (since I made no adjustment to the back piece). Now the shortened sleeve pattern piece will fit the adjusted (smaller) armsyce. If your petite adjustment affects both the front and the back pattern pieces, you will pinch a horizontal fold all the way across the sleeve piece to fit your new smaller armsyce.
Next, I adjusted the lapel pattern piece. I laid the lapel pattern piece on the front pattern piece along the neckline opening matching seamlines. I pinched a corresponding amount out of the lapel in the same place where the neckline was shortened by the petite adjustment on the front pattern piece. Now the shortened lapel will fit the new altered (smaller) neckline.
Other adjustments made to this pattern:
I find BURDA patterns are drafted with shoulders which are an inch wider than my shoulders. Also, my shoulders slope a little more than normal, causing unflattering wrinkles in the front and back of ready to wear clothes. So I integrate two adjustments in one step - shortening the shoulder seam and adjusting the shoulder slope.
I took a fitting class taught by Cynthia Guffey at the Sewing and Quilting Expo which has helped me to identify and fix my shoulder slope problem. If you ever have an opportunity to attend a class or a workshop by Cynthia, do it! She is meticulous. You may not always want to bother making perfectly fitting clothes for yourself, but you will know how to do it when you DO want to bother. (Personally, I ALWAYS want to bother, but I am picky picky picky.) Everything she teaches is available on DVD, so you can relax, put your pencil and notebook down, and just pay attention,learn, and enjoy. She is really fun in class, as well. You will laugh, and I promise, you will have several "ah-HAH" moments. She showed me how to figure out what she referrs to as shoulder slope. In order to fit me perfectly, the shoulder seam on my back pattern piece needs to have a slope to it which allows the shoulder point to be 1 1/8 inches lower than the neckline at center back. No matter what I make, a jacket, a blouse, a t-shirt, if there is no shoulder pad, I need this same slope on that back pattern piece! (If the pattern has a different shoulder seam as in a tank top that does not go from jewel neckline to shoulder point, the slope or angle is still the same.)
Whatever I have to do to my pattern piece to get that slope in the back, I repeat it for the front. In this case, I had to lower the shoulder. I started by cutting the pattern piece from close to the shoulder point to just below the armsyce. I dropped the shoulder point to 1 1/8 inches below the neck seamline at center back, matched the side seam, and slid horizontally until my shoulder seam measurement matched my body measurement of 4 3/4 inches. Then I held that shoulder point down and pivoted until the side seams matched up so I would not alter the side seam. Next, I redrafted the shoulder seam.
The final pattern adjustment involves redrafting the side seams along the hip line. I slipped my TNT skirt front pattern underneath the dress front pattern tissue and matched up the waistlines. Then I redrafted the side seam to match the TNT.
For the back, I need a sway back adjustment. It looks like this if I
use a one piece back. In order to keep the grain line straight, I cut
the pattern apart at the waist and keep the upper part of the pattern.
I use my TNT skirt back for the lower part of the dress. I will pin fit the dart with help from a DD or DH during the final fitting.
There you have it - my pattern alterations for the suit dress :) Now, do you see why I have reservations about MARFY patterns? I do love the designs, but I am challenged when it comes to alterations. I guess I could rationalize that I *need* the practice...
What are your alterations?
Pattern Drafting
A couple of years ago, I took a pant fitting class at the Worcester Sewing and Quilting Expo. The class was taught by Peggy Sagers. I now can sew pants that fit me perfectly. If you ever have an opportunity to take her class, I highly recommend you do it!
With my custom pant pattern, I made a basic skirt sloper. I sewed a mock-up to correspond to it, complete with a zipper. It has been hanging in my sewing room since 2007. Last night, I broke it out to draft a pattern for a skirt to go with my red leather jacket. I tried on the mock-up just to make sure I was still happy with the fit.

The sloper is for a mini skirt. I want this skirt to come to just below my knees, so I added length. I converted the darts in back to princess seams. Then, I angled the seam lines and added additional style lines.

I did this for the front and the back. Next, I drafted facings for the waistline. Voila! I now have a pattern for a skirt to go with my jacket!
With my custom pant pattern, I made a basic skirt sloper. I sewed a mock-up to correspond to it, complete with a zipper. It has been hanging in my sewing room since 2007. Last night, I broke it out to draft a pattern for a skirt to go with my red leather jacket. I tried on the mock-up just to make sure I was still happy with the fit.
The sloper is for a mini skirt. I want this skirt to come to just below my knees, so I added length. I converted the darts in back to princess seams. Then, I angled the seam lines and added additional style lines.
I did this for the front and the back. Next, I drafted facings for the waistline. Voila! I now have a pattern for a skirt to go with my jacket!
Subscribe to:
Posts (Atom)