Bernina My Label - first thoughts

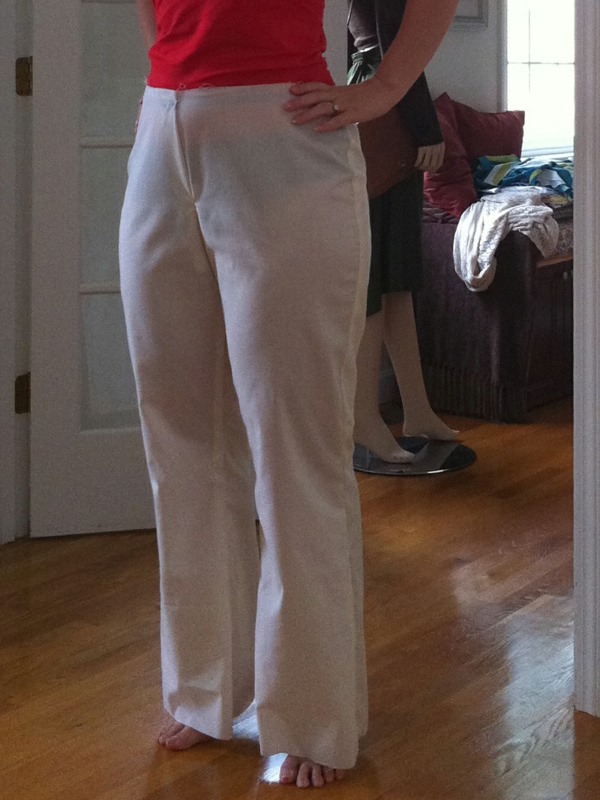
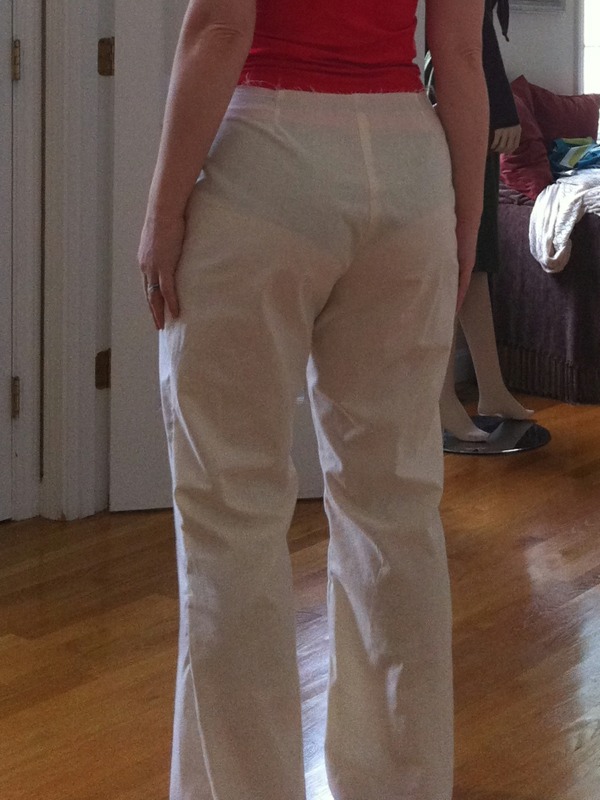
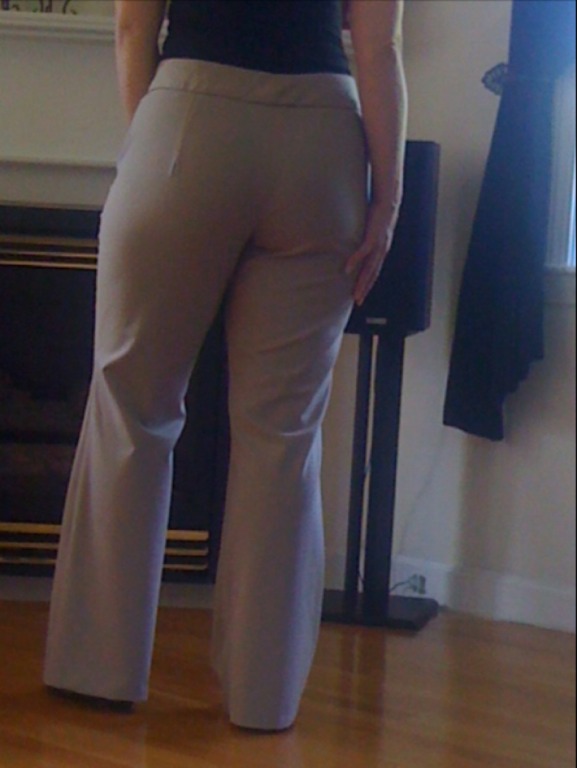
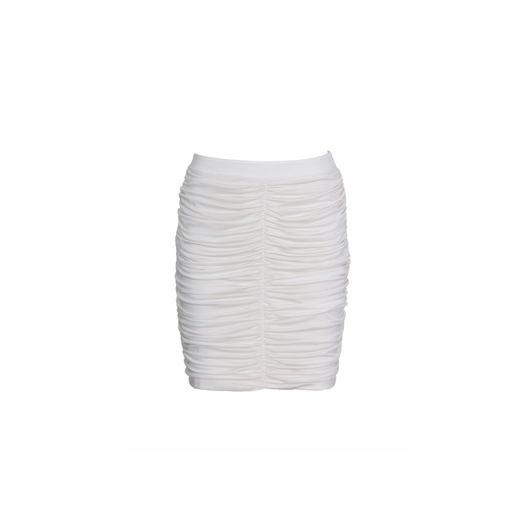
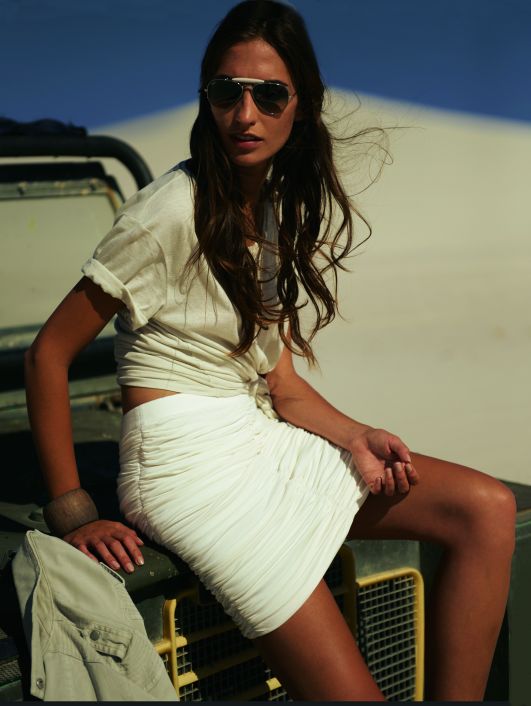
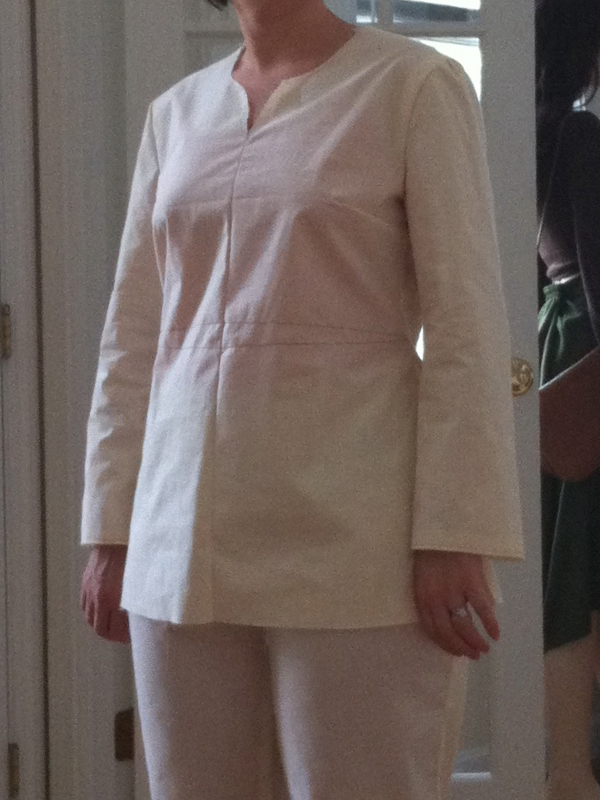
Can I just gush for a few minutes about Bernina My Label? I LOVE this software! The model looks so much like me, I am embarrassed to post a picture of her without clothes on.

Although the model on the left is wearing a different style than the muslin I am wearing in the photo on the right, you can see that the figures have the same posture and all the curves are in the right places and have the same proportions. The model is wearing shoulder pads and a bra. I am wearing just a cotton/Lycra camisole under the tunic, which accounts for the slight difference - if you even noticed it!

I looked at this program and downloaded the demo a while ago, but I decided I didn't need it at the time. Then I read about Robin's success with it here and I started to think I would really like having a virtual model to help me decide what to sew. I still wasn't ready to go ahead and buy the program, though, because I have two other pattern drafting programs which I never use. Also the program only has 20 different styles, so my assumption was that I would still be using commercial patterns and doing edits anyway. As much as I wanted to play with the model and try different styles on, I felt it was not a practical purchase.

Instead, I had my body scanned at Unique Boutique and I intended to purchase custom patterns from a retailer who would draft them according to my scanned measurements. When I got my measurements and my point cloud image, I was shocked to learn that my body is very asymmetrical. At the time, I was just beginning to suffer from frozen shoulder. I quickly lost most of the range of motion in my left shoulder and arm. I couldn't use a hair dryer, or dress myself for a while. My head is not centered and I have one shoulder that is higher and has a shorter seam length. The condition pulls at my neck causing it to be off axis. I also have a protuding scapula on the frozen side. In light of all this, I decided to focus on fitting pants until my frozen shoulder goes away. In the last several months, I have recovered much of my range of motion and I feel normal again, but I still have a slightly asymmetrical figure. During the process of trying to fit pants, I made several unsuccessful attempts and finally in a moment of desparation, I dashed out to buy the software.

There are not too many mathematical or geometrical things which challenge me the way making pants does. In fact, I can think of no greater challenge I have had with anything topological. I was convinced I could do this myself and it became a matter of pride not to buy the program even though in my heart of hearts, I lusted after it.

Once I knew I wanted it, I still needed a reason to swallow my pride and pony up the cash. I think it was my frustration with being so close and every time I thought I was fixing something, my pants got worse. Buying the software was my way of looking the answer up in the back of the book - so to speak. I wanted to get a good draft and reverse engineer it to see what I was doing wrong. I bought it impulsively and I am glad I got it. I think of it as I think of all the books I read about sewing. It is a source of inspiration and information, and I think it will accelerate me to where I want to be with my sewing - making clothes I can actually wear.

The program works really well. Yes, I have two other pattern drafting programs but this one is different. It lets me try things on my body. Some styles won't look right on my body or fit me well even if they are custom designed for me by the program. This is because the number of measurements used to make a custom draft are too few to cover every single figure variation known to mankind. Some people are just going to have to make manual alterations. Because of this, Bernina has given users fantastic support though forums, webinars, and documentation as well as personal email. This support has made the BIGGEST difference for me. I feel as though Bernina cares about each and every one of us home sewing enthusiasts and they have decided to teach us everything we may possibly need to know in order to be successful. They use pictures - lots and lots of pictures - to illustrate every detail of instruction. I have had more than one Ah-HAH moment reading through the PDF documents they post on line at the yahoo user group.

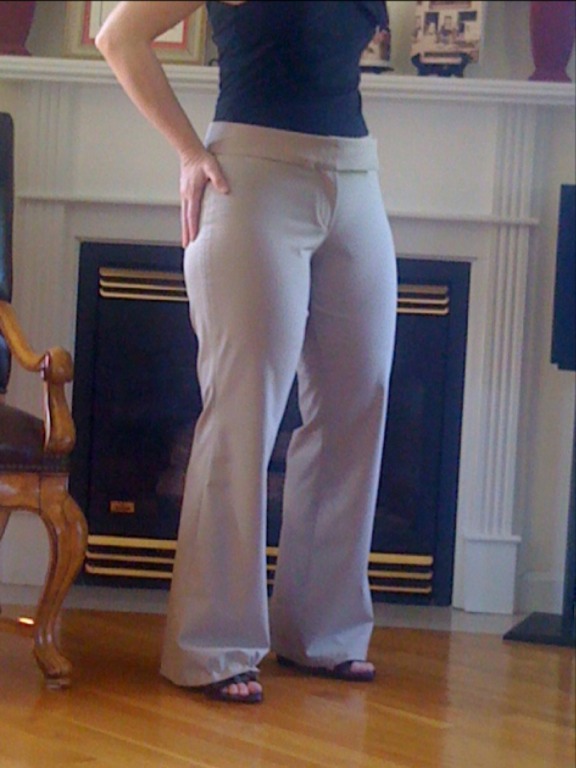
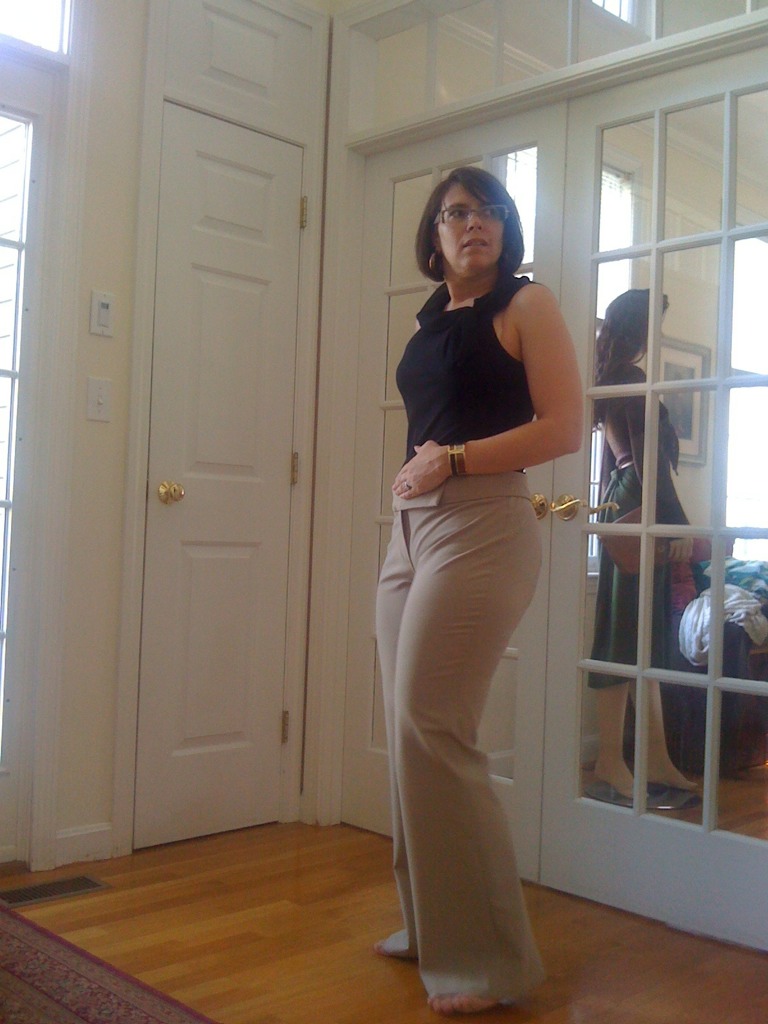
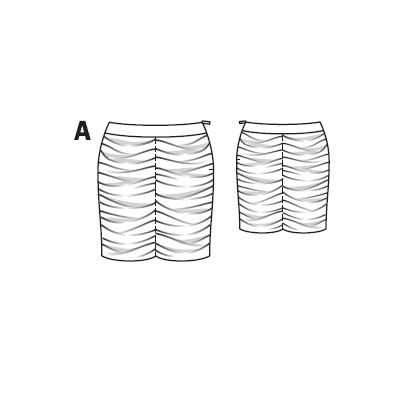
The actual pattern drafts are spot on. Seams which are sewn together are equal. The curves do not have jaggy-looking points along them. There are match points and circles 3/8" from dart points (called drill holes) which allow me to place tailors tacks right where I need them - or clips and tiny holes if I feel very confident. The ability to see the custom pattern stitched up on my body before I cut into fabric is a real time saver. I can tell if I am going to need to tweak a pattern before I even attempt it.

Some things the software does not do which would be useful for me are:

  • Allow asymmetrical model measurements - right now, you have to save a right and a left model and tape the different pattern pieces together down the middle. This is great, but I cannot simulate any garment on an asymmetrical model, so I cannot see if I will need to go through the trouble of using a separate left and right side. Some styles are more forgiving than others and may not need left and right sides. I would like to be able to tell before I sew.
  • There is no way to export the pattern pieces so I can edit them in a drafting program.
  • When using a plotter with roll fed paper, I still need to specify the exact length of paper I will need, because the program generates match marks at the four corners of whatever sized paper I tell it I am using. If I tell it I have a twelve foot roll of 36" paper, it will print one page - 12 feet x 36 inches. There goes my whole roll of paper! If I could eliminate the match points for printouts which only require one sheet, my ploter would print only what I need and I wouln't have to monkey around with the page size for each printout.
  • The program will simulate some Bernina embroidery designs and print marks on the pattern to help you place the stichout exactly where you want it. This is fantastic! I can tell if the design needs to be a little to the left, or a smidge higher, etc... I would like to be able to import my own embroidery designs. The instructions say to choose a similar design and use that to approximate. I could do that, but then the coolness of knowing exactly where the design will stitch out is lost.

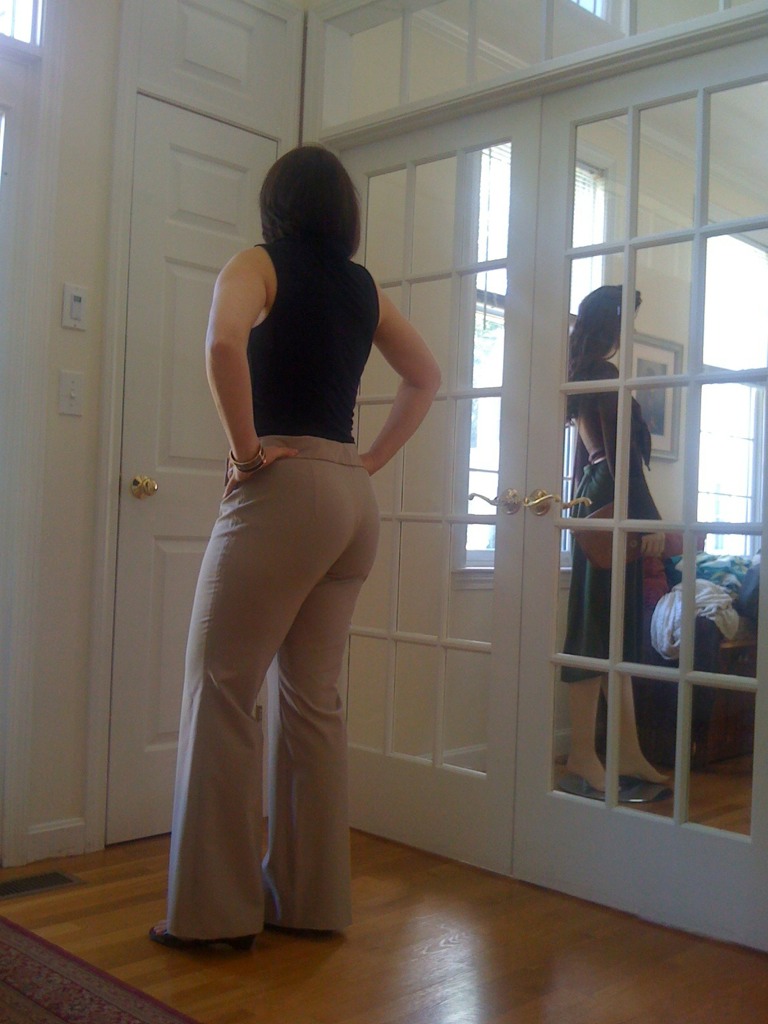
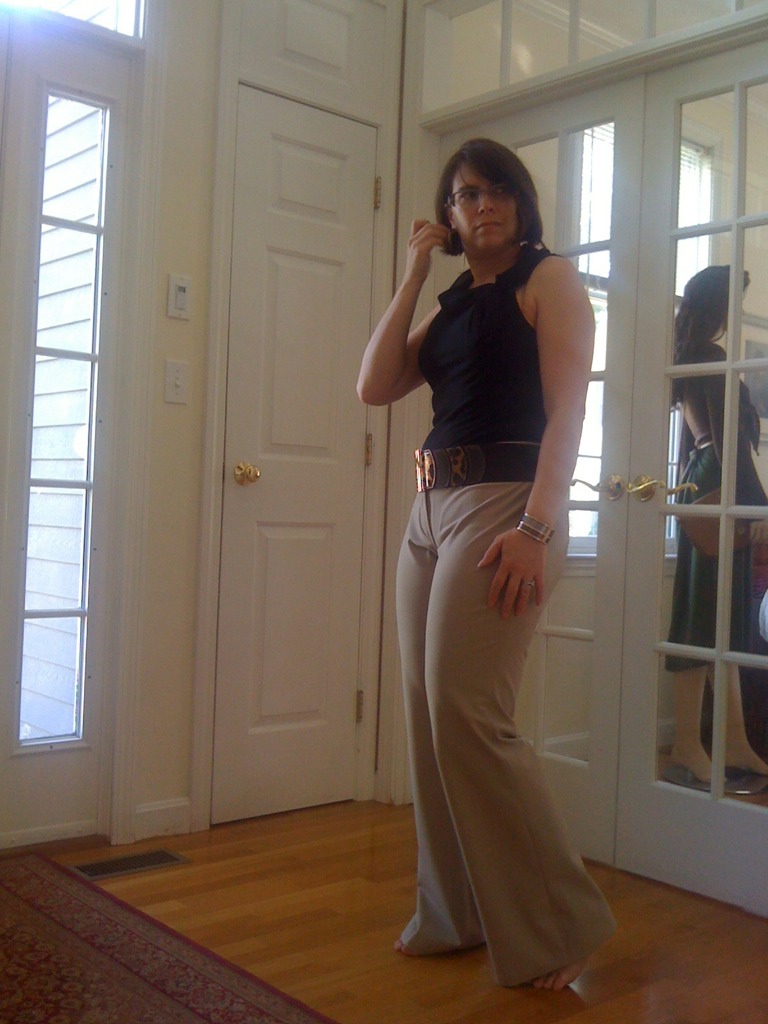
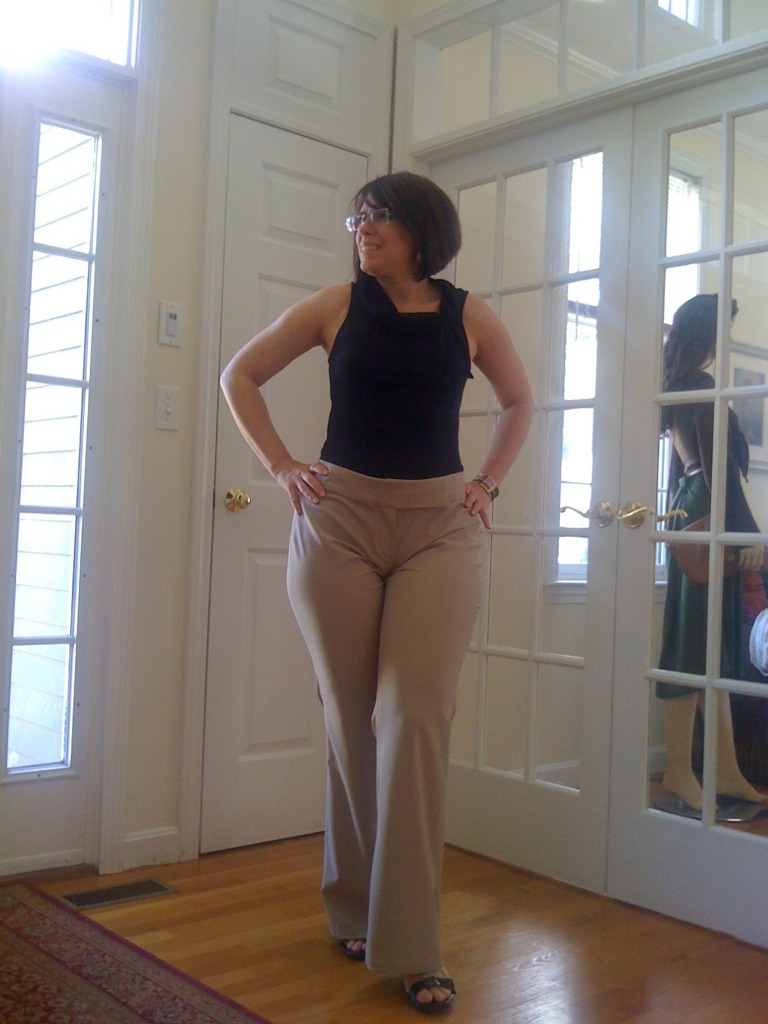
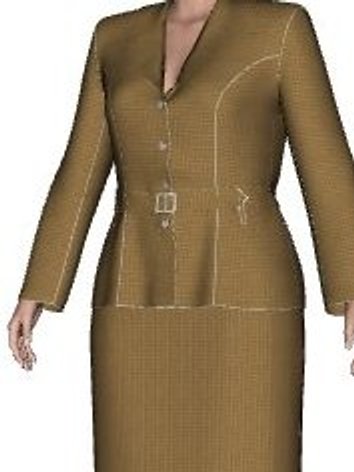
All in all, I think this program and I are going to have a long and fruitful relationship. I cannot wait to sew my Fall 2010 wardrobe. I will be able to wear pants! You have no idea what this means to a girl who is always cold. Sure, I love my dresses and tights, but now I will have another option. I do not have to put up with pants whose waist gapes away from my body in the back, or pants with big wrinkles pointing to the crotch, or pant legs that are way too tight in the thighs and huge everywhere else. I don't have to wear ultra low rise pants which reveal my underwear in the back when I sit down. I won't have to wear long, untucked shirts and blouses which end at the mid thigh level - the place where I want to focus the LEAST amount of attention. And hey, that belted jacket on the model doesn't look half bad. I make whip myself up one of those as well. Now, all I need is more TIME to play with my new toy!

I Have Great Fitting Pants!

I have been busy busy busy trying to make a well fitted pair of pants. You may recall my first attempt. I tried them on and smoothed them out in front of my mirror and thought they were a little tight, but otherwise excellent - until I walked around in them and saw what happened once the stretch fabric "relaxed". I made a second pair of pants from a self drafted pattern and I was so disappointed, I wanted to cry. They were just terrible and I had such high hopes for them... In desperation about a week ago, I called Nashua Sew and Vac 30 minutes before they closed last Sunday and asked Sherri if they had Bernina My Label in stock. She said yes. I told her I would be there in ten minutes! I didn't even ask her how much it was! I remembered looking at the program about a year ago and deciding it was too much money, but now I was desparate to get a good fitting pant pattern and dissect it to find out what makes a good pattern fit. It turns out I got it at quite a bit off the original retail price of $499! I am doing the Happy Dance!! I love this software!!

My Label is pattern drafting software with a really cool feature. It allows you to customize a 3D model with 47 measurements. As the measurements are entered, the model morphs to reflect each measurement. After all the measurements are entered you can choose a style and see a custom drafted pattern appear on the work table. You can tweak the style measurements (which are based on the model measurements) and then try it on the model. I have had so much fun playing with this virtual fitting room! I can see what styles look good on me without having to stitch them up first! I have made two test garments and I am working on qualifying my measurements - a process of making a muslin and measuring the fit of the muslin in order to tweak the model measurements.

I have a really good fitting pair of pants from my first draft! The beauty is that there is FABULOUS support documentation available. I found this PDF file which taught me about some of the figure variations I had never considered before and how to correct the pant pattern to fit better. If you have ever had trouble fitting pants, give it a read.

Understanding a Pants Pattern

I am really trying to wrap my brain around the pant draft. I design three dimensional objects in flat layers for a living, so the ability to see two dimensional objects take shape in three-D is something that I have practiced and developed over the course of the last - well let's just say - large number of years. With all that experience, one would think this would be a cinch. I *will* figure this out! And I will share :)

This is what I have done so far: I traced my RTW pieces onto tissue and cut them out. Next, I used my flexible ruler to get my crotch curve. My waist is level, so I positioned the flexicurve with the waist level. The waistband is two inches long and I will wear these two inches below my natural waist, so the pattern pieces come up to four inches below where the waist is marked on the curve. I widened the legs by adding a half inch to both sides of each piece, giving a total of two more inches in circumference. (After the pants are finished, I will put them on inside out, pin out any extra fullness and then transfer back to the pattern.

  • FRONT piece:
    • marked the grainline with a fold
    • positioned the grainline perpendicular to the waist level line
    • taped the pattern to the flexicurve
    • scooped out an inch from the front crotch curve
    • added the inch back to the hip by slashing and spreading the pattern piece
    • added an inch to the extension
    • measured from my crotch down to my knee on my body
    • marked the knee with a fold the corresponding distance down from the crotch
    • marked the crotch depth with a fold
  • BACK piece:
    • marked the grainline with a fold.
    • positioned the grainline perpendicular to the waist level line
    • taped the pattern to the flexicurve
    • I had to do some folding and some spreading to get the pattern to follow the flexicurve. You can see where I made several abandoned attempts where there are crease lines.
    • marked the knee with a fold.(There are two folds at the knee. It's the fold on the bottom. The top one was an abandoned attempt to make the leg go straight after adding to the extension. I am going to remove that addition to the extension. You can still see it in the picture. It is where the crotch extensions overlap.)
    • marked the crotch depth with a fold. It's the one on the top. It lines up with the crotch depth of the front piece. The bottom fold is how far below the crotch line the back piece dips. (Actually now that I think about it, the bottom line is the real crotch depth. When I sit down, the inseam of my pant legs is above the level of the chair by about the distance between the two folds. this makes sense to me now as I am processing and typing. I will go and raise the fold on the front piece.)
    • folded and trued the dart
    • checked the inseam lengths to make sure they are equal
    • checked the outseam lengths to make sure they are equal
    • checked the total circumferences against my personal measurements at the knee
    • checked the total circumferences against my personal measurements at the thigh
    • checked the total circumferences against my personal measurements at the bottom edge of the waistband - 4 inches below natural waist
    • checked the total circumferences against my personal measurements at the crotch depth

This is what my pattern looks like. You can click it to make it bigger or see it full-sized here. There is a two inch wide contoured waistband not shown. There are no seam allowances. The back crotch scoops down below the height of the inseam. See that angle to the back? And the center front is off grain. Does this look right? Does anyone else have a back pattern piece that looks like this?

Help Me Diagnose These Wrinkles

The pants are finished! They are too tight to actually wear but the next pair will be great! I think if the fabric were a thicker material like stretch denim, I could use the pattern as is, but this light weight stretch tropical wool needs a little more ease. After wearing the pants for a while, I noticed wrinkling at the front crotch. My daughter says this is because the legs are too tight and they are riding up. Does anyone concur? I would love to just cut another pair with wider outseam allowances and have them fit.

RTW Knock-Off - A Smashing Success!

Here is an update on my RTW trouser knock off project. I have to rave a little bit about the menswear waistband. WOW! I may have to do a tutorial on this. It would simply be unfair to keep this gem to myself. As you know, the pants are made from stretch tropical wool and they have a contoured waistband. With the menswear facing/interfacing assembly, the pants hang perfectly and look neat and tailored. The cool thing about using this method is that I can make yards and yards of the stuff and use it to face all of my waistbands! I noticed that tie interfacing is not the same stuff used on my RTW waistband. The tie interfacing is sturdier and bulkier but I am going to stay with the tie interfacing since I have so much of it. After I ordered from Peggy, I checked my stash and sure enough, I had already bought some from her at the sewing expo, so now I have three yards of it. I have enough to make 32 more waistbands before I run out.

The pants are almost finished. I just need to hem them and add hooks and eyes to the waistband. Originally, they were a little tight in the thigh, so I let the inseams and outseams out, adding a total of an inch to each thigh. Then when I tried them on I was happy with the fit but unhappy with the ridge along the outseam. I restitched just the outseams with 1/2" seams and tried them on again. They are still a little tight, but they are made from stretch fabric. My husband and my daughter each give the pants two thumbs up. My husband said it was my best work to date. My daughter couldn't believe I made them. She thought I bought them. Since I buy my pants at Ann Taylor, I was impressed that my daughter couldn't tell the difference. I am attributing this to the waistband.

My daughter was so impressed with the pants that she was inspired to sew something for herself. We sat looking through the July issue of BURDA Style Magazine together and she decided to make this skirt. It seams like an easy enough and forgiving enough project for a beginner to tackle. I knew I saved my Elna all these years for a reason! I hope she enjoys sewing as much as I do! I am keeping my fingers crossed. My husband has cautioned me not to get my hopes up too high. I am trying not to run around yelling "YIPPEE!! YIPPEE!!"

Updates and pictures to follow!! Happy Sewing!!